Last updated on October 11, 2024

Oblivious Bookworm | Illustration by Josh Newton
Greetings planeswalkers! You’ve barely survived about two weeks of Duskmourn: House of Horror thus far, but fear not! You’re about to get a major Helping Hand. With this Ultimate Draft Guide, you’ll have all the information you need for success in Duskmourn Limited (including the Arena Open this weekend).
Let’s begin!
Introduction

Unsettling Twins | Illustration by Lauren K. Cannon
Duskmourn has been a fun Limited set so far, with decent color/archetype balance overall. Every color pair is at least somewhat viable, though there are decks (i.e. GW Survival) that I’m biased against from experience.
The format has not felt especially fast so far, although two of the best decks (WU/RW) can be punishing. “Average but varies by archetype” is probably how I’d describe the gameplay pace, at least from my experience of mostly playing BO3 Magic Online drafts. 2-drops are important, but they often end up trading with a manifested card or another 2-drop, which keeps most games from being one-sided stomps.
Mechanics Revisited
My first Duskmourn Sealed guide was a “Day 0” take on the format, while this Draft guide polishes on the outline I’ve laid. To that effect, I’ve liked revisiting old sections to opine on how things have actually played out. Here we’ll briefly touch on how each of the set’s mechanics have played out in Limited.
Rooms

Duskmourn‘s room enchantments have definitely impressed me. The best rooms (i.e. Glassworks // Shattered Hall) are obvious staples, but even mediocre rooms like Derelict Attic // Widow's Walk can do good work thanks to the set’s synergies. Rooms are a great source of both eerie triggers and fodder for cards like Final Vengeance. They’re also the primary mana sink of Duskmourn; much mana flooding in this format has been saved by Meat Locker // Drowned Diner.
Eerie


WU Eerie is neck to neck with RW Aggro for the spot of “best archetype” and owes much of its strength to pushed uncommons like Optimistic Scavenger and Gremlin Tamer. Black’s eerie cards (i.e. Balemurk Leech, Skullsnap Nuisance) haven’t been as impressive as white’s, though. It’s an easy mechanic to trigger when you want to, as it’s not hard to get enchantments in Duskmourn.
Survival


Survival has been a bit of a disappointment, both as an archetype and as a mechanic. While it’s definitely easier to pull off than something like inspired, it can be difficult to get multiple triggers from cards like Veteran Survivor or Glimmer Seeker. I’ve mostly used survival as a subtheme in decks, as a couple of the survivors (i.e. Defiant Survivor, Rootwise Survivor, Reluctant Role Model) are worth the effort.
Delirium


Both flavors of delirium have been solid for me. RG seems to come together a bit more often, perhaps because its signposts are less splashable than BG’s. Turning on delirium ranges from challenging to easy, with a lot of room for variance in deck construction and how your draw plays out. Say Its Name and Commune with Evil are amazing enablers for this mechanic, often coming close to reading “you have delirium” in practice. How important enabling delirium is will vary from deck to deck, and can be an essential goal (i.e. Fear of Burning Alive, Omnivorous Flytrap) or minor bonus (Spineseeker Centipede).
Manifest Dread


Manifest dread is an important mechanic that helps enable delirium and slow games down, and it’s its own archetype in GU Manifest. GU has been my personal favorite/most successful archetype, mostly on the back of its very powerful signposts Growing Dread and Oblivious Bookworm (especially Bookworm, which is among the set’s best uncommons).
When playing with/against this mechanic, pay close attention to what card your opponent bins with manifest dread. If they binned a creature, then you can almost be sure that their face-down card is a better creature than the one they binned.
In paper Magic, your opponent may give you free information while they’re binning cards. Some things you can look for: facial reactions to what they’re hitting, the pace at which they make their decision (i.e. did they immediately throw away Forest and place the manifest face down, or did they tank and then throw away a creature?), and more.


The same goes for when you’re manifesting, so be careful not to get wide-eyed if you’re lucky enough to manifest Abhorrent Oculus or Patched Plaything.
Once a manifest is in play, the game of “It’s a bear… or is it?” begins. This can provide opportunities to bluff an attack, dissuade attacks, or catch your opponent off-guard if you know what you’re doing.
Each turn that progresses gives you more and more information as to what a manifest is. If you’re trying to figure out what your opponent has face-down, ask yourself these questions:
- Does my opponent want to trade their manifest with my manifest and/or 2-drop?
- Have they left mana open then declined to spend that mana after leaving a manifest to block?
- Have they attacked with the manifest yet?
- What did they bin when they manifested it?
- How many turns has the face-down card been manifested?
Manifests that haven’t been flipped up become increasingly likely to be blank 2/2s each turn that goes on. Exceptions to this rule (i.e. a sandbagged Slavering Branchsnapper) can be deadly, though!


Speaking of deadly occurrences, there are a lot of things that can go wrong for you with this mechanic. Examples include Patched Plaything or Abhorrent Oculus flips, surprise reach blockers like Broodspinner (lost me a game once), or cheap deathtouchers like Flesh Burrower trading up unexpectedly.
The easiest way to avoid getting blown out by manifests is to keep them off the board if you can, either with early low-value trades (your own manifests, 2-drops) or cheap removal like Winter's Intervention. Pump spells like Horrid Vigor can also provide some security against unexpected flips.
Overall, there’s no single heuristic for playing with/against manifest, but try to think carefully and deduce hidden information based on how your opponent is playing. Less experienced opponents may practically shout at you what the manifest actually is!
Impending


You won’t see this mechanic much, but surprise surprise, all the impending Overlords have been wicked in Limited. Overlord of the Mistmoors has the official title of “most broken rare in the set,” with the other four ranging from bombs to one that’s merely great (Overlord of the Hauntwoods, which incidentally has been the best one in Constructed so far). The only real drawback to these mythics is that they aren’t easily splashable; if you open one off-color, your options are to switch one of your colors, wreck your mana base, or pass it.
I hope for my readers to open many of these as the format goes on!
Set Overview Revisited
Same idea here, let’s take another quick scroll through the concepts touched on in the last guide.
Thematic Overlap
There’s direct overlap between WU/UB Eerie and RG/BG Delirium, with each pair having a fast/slow split. WB hasn’t played eerie as a subtheme as much as I expected, though BR does do a good job of hitting delirium naturally. To this effect, I sometimes find myself playing a copy or two of high-end delirium cards like Impossible Inferno and Fear of Burning Alive in my BR decks.
Some other points of overlap that I’ve realized are:
- BR Sacrifice and UB Eerie have surprising overlap in Duskmourn. Both are slower archetypes that play well with many of the same black cards like Nowhere to Run, rooms, and Final Vengeance.
- UG Manifest often naturally hits delirium via manifesting dread, which means it can sometimes splash cards like Broodspinner and Beastie Beatdown to great effect.
- If you’re willing to compromise a bit on your mana, WB Reanimator has excellent synergy with GB Delirium. You can leverage cards like Say Its Name and Broodspinner to make Emerge from the Cocoon plus Shroudstomper much easier to pull off.
- While it won’t come up often, you can occasionally make use of blue tap effects with green or white survival creatures. Meat Locker // Drowned Diner doesn’t say “opponent controls” on it, so I had one game when I was able to use it on my Defiant Survivor for safe value.
Colors
After playing a healthy amount of the set (roughly 90 drafts!), I’d rank the five colors as follows:
- White
- Red
- Green
- Blue
- Black
White


White has two excellent common removal spells (Trapped in the Screen and Seized from Slumber) and some solid creatures to fill out your curve like Fear of Surveillance and Unsettling Twins. Proactive white archetypes like WU Tempo and RW Aggro are often great in Duskmourn drafts.
Blue


Blue’s best strengths at common are Glimmerburst and Unable to Scream, making it a strong base color for slower decks. It also has two decent counterspells, which are great against clunky decks like WB Reanimator. Its main weakness is typical for blue, which is that most of blue creatures are mediocre at best.
Black


Black’s creatures are even worse than blue’s, with true stinkers in Duskmourn like Cackling Slasher and Balemurk Leech. Black does have three great removal spells, and Final Vengeance has particularly left an impression. You should mostly be black for those or powerful uncommons/rares, as black offers little else compared to other colors.
Red


Red is a proactive color as always, though its two best commons are red removal spells (Scorching Dragonfire and Glassworks // Shattered Hall). Most red creatures pair best with white or green in aggressive strategies. UB and UR often find themselves wanting only specific red commons, as they’re much less likely to want beatdown cards like Most Valuable Slayer, Ragged Playmate, or Vicious Clown.
Green


Green is the most flexible color in the set, thanks to good green creatures and mana fixing. It’s an essential baseline for delirium decks thanks to cards like Spineseeker Centipede, Manifest Dread, and Say Its Name. What it mostly lacks are enchantments, which green has less of than any other color.
Removal Revisited
I mostly stand by what I said about the removal spells the first go-around, but I wanted to add a couple of points.

Seized from Slumber is better than I expected. There isn’t much vigilance in the set, so in practice playing around this is often difficult.
Unable to Scream isn’t a “solid playable;” it’s a genuinely great removal spell! There aren’t many disenchants or sacrifice effects in the set, so for the most part Unable to Scream has been rather effective (and always efficient) removal. Its main blind spots are threats like Moldering Gym // Weight Room, which would still be a 3/5 even with this on it.

Vanish from Sight has also overperformed a little bit. I don’t prioritize it or love it, but I’m happy to play a copy in most decks. The “surveil 1” text goes a long way towards making this feel decent.
Final Vengeance is essential in BR, excellent in UB, and okay in other archetypes. I’ve played between 0-3 copies of this; how many you should start depends heavily on your deck (and perhaps the matchup, in BO3).

Murder slightly edges out Winter's Intervention for me, though is a bit of an ask when black is the weakest color in the format.
Glassworks // Shattered Yard is even better than expected due to its value as a sacrifice piece. Shattered Yard can close out games, but it’s overcosted enough that I’m happy to sacrifice this to cards like Final Vengeance early and often.

Impossible Inferno has underperformed expectations a little. I like it in most RG builds, but I rarely splash it or prioritize it. There are usually more important cards to pick for delirium decks.

Bear Trap has been weaker than I described, unfortunately. I still play it occasionally for delirium purposes (or as a sideboard card against Entity Tracker), but I’m never thrilled to. Most of its problems just come down to raw efficiency, as you’re ultimately paying a bit more for a bit less with Bear Trap.
Splashing

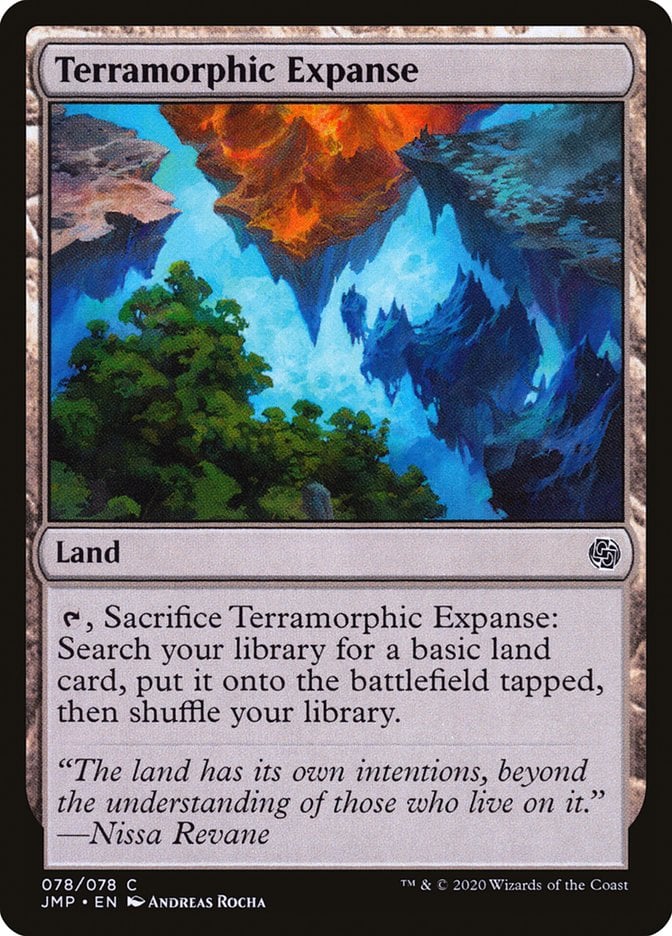


Splashing in this Limited set is certainly possible, though not always recommended. I’d estimate that I probably splash in about one out of six drafts. As with most sets, this is much easier to do in green decks, which have convenient access to Spineseeker Centipede and Moldering Gym // Weight Room. Non-green decks are reliant upon dual lands, Terramorphic Expanse, Haunted Screen, and Keys to the House, which are fine but won’t always be available in DSK drafts. I’ll revisit cards that I recommend splashing when I review what I said about rares in Duskmourn.
Top Commons Revisited
This is a fun section to do, as I get to see how my predictions panned out in the real world of Draft! I think I mostly got the #1 spot correct, but I missed on several other inclusions.
White
I had Trapped in the Screen, Hardened Escort, Unsettling Twins, and Fear of Immobility as my top four commons. Hardened Escort and Fear of Immobility were misses; neither is terrible, but both feel more like filler in most decks. They’re a little bit more valuable in GW Survival, though GW itself is one of the weaker archetypes.
My revised rankings would be:
Fear of Surveillance definitely wins the 2-drop war over Acrobatic Cheerleader and is a decent little guy overall for most decks. It’s an enchantment for WU, a 2-power beater for RW, and even provides a bit of graveyard synergy for WB. Seized from Slumber is just efficient enough to make the list, though I might only want a single copy in a deck like RW Aggro.


Two white commons I’d generally avoid playing are Living Phone and Possessed Goat (outside of WB Reanimator).
Blue
I had Tunnel Surveyor, Glimmerburst, Unable to Scream, and Underwater Tunnel // Slimy Aquarium as my top four commons. I don’t think any of these were misses, but I’d bump Underwater Tunnel // Slimy Aquarium out for another common room, namely Meat Locker // Drowned Diner. I’d also want to shuffle around the places a bit to reflect how the cards have performed in practice.


My revised rankings would be:
It’s worth noting though that blue is a pretty well-balanced color; there isn’t much of a quality disparity between Twist Reality, Underwater Tunnel // Slimy Aquarium, and Stalked Researcher, for example.


The main blue commons I’m not a big fan of are Erratic Apparition, Clammy Prowler, and Enter the Enigma, though the two creatures are passable filler in WU Eerie.
Black


I had Murder, Winter's Intervention, Final Vengeance, and Innocuous Rat as my top four commons. I actually wouldn’t change these at all! Black is usually pretty defensive/grindy, so it definitely wants removal spells and a cheap blocker like Innocuous Rat. Fanatic of the Harrowing would be #5 if I extended the list by one more spot, as it’s excellent in WB while still being solid in the other three archetypes.
Black’s main weakness is that it doesn’t have much else; most of its other commons are filler cards at best, and Murder may force you to play them by warping your mana base around it.
Red
I had Scorching Dragonfire, Glassworks // Shattered Hall, Boilerbilges Ripper, and Impossible Inferno as my top four commons. The two 5-drops were poor inclusions; Boilerbilges Ripper has only impressed in BR Sacrifice, while Impossible Inferno is similarly limited to (mostly) RG decks.


My revised rankings would be:
Clockwork Percussionist is surprisingly strong in a variety of decks; it gets in early damage for RW and RG, makes for great fodder for BR, and even has a useful secondary type for delirium once you’ve chumped with it. 1-mana cantrips rarely appear on bodies like this, and “until the end of your next turn” does a lot of work in making Clockwork Percussionist pretty close to “draw a card” when it dies. Turn Inside Out is the best pump spell in the set, as it has a very strong rate for just . It plays particularly well with Clockwork Percussionist, which often looks to “harmlessly” chump attack/block into creatures later in the game.


Red’s weakest commons are Boilerbilges Ripper and Rampaging Soulrager, which should only be played in their respective archetypes (BR Sacrifice and UR Rooms). Even then, they’re usually more on the side of “decent filler” than cards to prioritize. I’ve also been unimpressed with Ripchain Razorkin, which trades down frequently and costs too much mana to activate often.
Green
I had Monstrous Emergence, Spineseeker Centipede, Moldering Gym // Weight Room, and Wary Watchdog as my top four commons. Moldering Gym // Weight Room has been decent, but I rarely want more than one as both modes have felt pretty slow. Wary Watchdog was about as good as I expected, but I’d edge it out for a couple of other commons.

My revised rankings would be:
Manifest Dread is generally the best of green’s three 2-drop creatures (if you count it as one). BG and RG enjoy the easy delirium setup it provides, while GU is of course interested in just about any card that manifests. Say Its Name is even better for delirium, and it also has a neat little side quest/reward if you can draft 3+ copies of Say Its Name and an Altanak, the Thrice-Called. Given that Say Its Name is a pretty great consistency card on its own, I find myself drafting it early and often.

Anthropede is a pretty weak common that I usually avoid. It has mediocre stats for its cost and the room destruction text hasn’t felt all that relevant. Most rooms already have done whatever important thing your opponent wanted them to do before you can blow them up with Anthropede, though there are some exceptions like Unholy Annex // Ritual Chamber and Central Elevator // Promising Stairs.
Bombs Revisited
This is another brief stroll, as I won’t be rewriting blurbs of approval for every card I listed. Instead, I’m only including cards where my initial take was wrong in some way, for better or for worse.

For whatever reason my brain first read Dollmaker's Shop // Porcelain Gallery as “make a 1/1 Toy that is tapped and attacking.” It doesn’t actually say this, so in practice it’s been incredibly easy for whoever has this to safely make a token army, activate Porcelain Gallery, then win the game in 1-2 attacks. Definitely a bomb/gross card that requires no real effort to build around.

I didn’t mention that The Wandering Rescuer can give you cheeky survival value sometimes, which is cool. I also got to play it with Split Up once to great effect.

Plague Wind deserves better than “great” if you can pull it off. I’ve gone so far as to splash The Rollercrusher Ride in UB Eerie, so suffice to say I underrated it a bit.

Probably underrated Tyvar, the Pummeler by merely calling it a bomb. Just a truly miserable card to play against, though there are thankfully some answers that get around indestructible (i.e., Final Vengeance, Trapped in the Screen, Unable to Scream, Sporogenic Infection, Nowhere to Run, etc.). Black seems to have the easiest time of dealing with it, while red and green are almost entirely out of luck!

Entity Tracker is just another bomb. It’s so easy to trigger this multiple times, and it even eats manifests, which usually forces an instant concession.

Unholy Annex // Ritual Chamber is probably a top five rare in this format, which makes it much more broken than I gave it credit for. Even if the demon dies, you’re usually getting at least one +2 life trigger from it, which is another bonus on top of the overwhelming card advantage this creates.

Recurring theme here is that I underrated rares! Unstoppable Slasher is another really gross bomb that’s hard to deal with, often demanding specific answers like the ones I mentioned for Tyvar, the Pummeler. It’s a bit easier to deal with though as Scorching Dragonfire also does the job. Note that the combo of the Slasher + Ragged Playmate is truly disgusting!

I neglected to mention how cute Enduring Vitality is with survival creatures. Alongside vehicles, this is one of the most convenient enablers there is, and it goes wonderfully with better survivors like Defiant Survivor and Glimmer Seeker.

Kona, Rescue Beastie is probably a bit overrated, though I did lose to Orphans of the Wheat into this dumping Shroudstomper on turn 4 once. It’s hard to get any consistency out of Kona, Rescue Beastie, as it can never really survive combat on its own.

Valgavoth's Onslaught is even better than described, either the #1 or #2 rare in the set depending on how you rate Overlord of the Mistmoors. It’s also imminently splashable for some reason, so have fun!

Rip, Spawn Hunter is powerful, but it forces you into a mediocre archetype with inconsistent support. I find myself passing this often and drafting other archetypes.

Finally, a rare that I overrated rather than underrated! Victor, Valgavoth's Seneschal just isn’t all that great to be honest. Though its vanilla stats and abilities look promising, in practice it doesn’t work well with its archetypes theme or do enough to be worth splashing in WU/UB.

Yet another rare that I was too cool on (pun intended). Roaring Furnace // Steaming Sauna is among the best rares in the set, and also quite splashable if you’re base blue. I even had one BR deck that “splashed” the UR side using Keys to the House!

Zimone, All-Questioning is a really strong card that I once again underrated. It’s easy to get a bunch of value off this if you draw it at any point before very late in the game. As a bonus, it’s also an excellent card to manifest, since the “end step” templating works perfectly for surprise token value. This wouldn’t have been the case if it had an “enters” trigger!
Don’t take my earlier advice; Abhorrent Oculus is busted! While I was right that this is mostly just a GU card in practice, it hasn’t been nearly as difficult to enable as I imagined. This is the best card to manifest in the set, but it also becomes more and more castable with every other card you manifest. I’ve even splashed in BG Delirium to good effect, so please don’t miss out!

Central Elevator // Promising Stairs isn’t the best try-hard card in the set, but it’s a little more practical than I gave it credit for. You can win with this, though in practice you might end up like my opponents who have often died the turn before this was going to win the game. Either way, it’s a sweet build-around for a control deck, even if I’ve yet to pull it off myself.

Dissection Tools somehow didn’t earn a mention in the Sealed guide, which seems like a big mistake in retrospect. Not only is this a great rare for any deck, but it’s also a colorless card, which makes Dissection Tools the single best P1P1 in the format! The baseline here is 4/4 deathtouch/lifelink, but it’s extremely dangerous when you flip a real creature under it. The equip cost can be risky but effectively makes Dissection Tools impossible to race without multiple removal spells.

Sheltered by Ghosts is the strongest uncommon in the set, so it deserves a mention here as a surprise hit of sorts. Sheltered by Ghosts forces a huge life/tempo swing and demands an immediate removal spell, or else things just keep getting worse and worse for your opponent. It’s even deadlier with cards like Shardmage's Rescue and Don't Make a Sound, as ward 2 often forces your opponent to play right into your hands.
Splash Recommendations
Here are some of the best cards in the format to splash in most decks. Generally, this means cards that are powerful, single pipped, and good at any point in the game. Try to only splash when you have at least 3+ sources of whatever color you’re splashing (i.e., 1 Swamp, 2x Spineseeker Centipede for The Swarmweaver in a GU deck).
- Valgavoth's Onslaught
- The Swarmweaver
- Zimone, All-Questioning
- Unstoppable Slasher
- Entity Tracker
- Roaring Furnace // Steaming Sauna
- The Rollercrusher Ride
- Niko, Light of Hope
- Screaming Nemesis
- Kaito, Bane of Nightmares
- Sheltered by Ghosts
- Unnerving Grasp
- Oblivious Bookworm
- Under the Skin
- Trapped in the Screen
Archetypes In-Depth
Here’s how I’d rate the archetypes in Duskmourn:
- Tier 1 (best of the best)
- RW Aggro
- WU Eerie
- Tier 2 (good decks)
- Tier 3 (mediocre decks)
- GW Survivors
- UR Rooms
- WB Reanimator
- UB Eerie
- Unofficial Archetypes
- WBG Reanimator
- 5c Marina Vendrell
- Blue Mill
There’s no archetype that’s unplayable or even close to it; if your table is shipping you nothing but Baseball Bat and Shrewd Storyteller, by all means feel free to draft one of the so-called “mediocre” decks. But in a vacuum, try to lean towards the better supported archetypes if you can (especially if they’re open).
RW Aggro


RW in Duskmourn does what it does in most Limited sets, but it does it well enough to be one of the best decks in the format. As with most aggro strategies, RW depends less on bombs or higher rarity cards and more on an aggressive curve backed up by pump spells like Turn Inside Out and Jump Scare. What distinguishes Duskmourn’s RW Aggro from other formats is the small but relevant “2 power or less” theme, as seen on cards like Arabella, Abandoned Doll. When built around correctly, this theme can give RW a great deal of tempo, reach, and perhaps even card advantage.
Payoffs


RW’s best payoffs are its two signpost uncommons, Arabella, Abandoned Doll and Midnight Mayhem. These are among the strongest signposts in the entire format, and they work excellently together. Irreverent Gremlin, Razorkin Hordecaller, and Painter's Studio // Defaced Gallery are also great for this archetype. Note that you can occasionally get extra value from Midnight Mayhem by combining it with other gremlin cards like Irreverent Gremlin.
Key Cards


RW is all about curving out, so good 2-drops are your highest priority. Here’s how I’d rank the uncommon/common ones in this archetype:
- Arabella, Abandoned Doll
- Irreverent Gremlin
- Splitskin Doll
- Piggy Bank
- Ragged Playmate
- Orphans of the Wheat
- Fear of Surveillance
- Acrobatic Cheerleader
- Hand That Feeds
There’s a huge gulf of quality between the best uncommons and Hand That Feeds, but there’s not much of a gulf between Fear of Surveillance and Hand That Feeds. As such, it’s okay to compromise a little on quality if that helps you hit a critical mass of early game cards. You’ll want to backup your creature base with removal spells, Jump Scare, and Turn Inside Out. As for higher mana values, Vicious Clown, Unsettling Twins, and Most Valuable Slayer are some of the better inclusions in this archetype.
Trophy Example

Playing Against It
Cheap removal, early blockers, and sweepers (if you have them) are your best bet for staying alive. This is the Pyroclasm matchup, though there are unfortunately a couple of cards like Arabella, Abandoned Doll that you’ll need other answers for. Oftentimes victory comes down to having a removal spell for Ragged Playmate, which threatens to make stabilizing impossible against this deck. I’ve also occasionally won this matchup by taking advantage of Arabella, Abandoned Doll’s artifact type with cards like Break Down the Door.
WU Eerie
WU Eerie and RW Aggro are neck and neck for the title of “best deck” in the format. I’d say that WU probably has a higher ceiling than RW, as good builds of WU Eerie have felt nearly unbeatable. Getting cut when drafting this deck can be a rough experience though, as there’s a big difference between its best cards and its filler.
Payoffs


Gremlin Tamer is in my opinion the single strongest signpost in the set. It just makes so much cardboard for so little investment, costing only 2 mana and asking very little of you (“play enchantments” in Duskmourn is hardly a request). It’s generally going to be the best reason to be UW, though there are of course other excellent incentives like Inquisitive Glimmer, Enduring Curiosity, Optimistic Scavenger, Entity Tracker, and Ghostly Dancers. How good your WU deck is often depends on how many busted uncommons and rares you have that tie into the set’s larger enchantment theme.
Another thing worth mentioning about WU is that it’s also the best Voltron deck in the format. Ethereal Armor, Sheltered by Ghosts, and Shardmage's Rescue work excellently together if you can get them. I’ve also just been fond of Ethereal Armor here in general; even without protection, just slapping it on a Glimmer token can make for an immediate must kill threat.
Key Cards

Of course, you can’t usually build a deck with just rares, so that’s where uncommons come in. WU gets more out of common W and U rooms than other archetypes, particularly Grand Entryway // Elegant Rotunda which is at its best here. I also love that Unable to Scream, Glimmerburst, and Trapped in the Screen are somehow even better than usual here, thanks to eerie triggers. My 2-drop creature priority for WU Eerie is as follows:
- Fear of Surveillance
- Stalked Researcher
- Piranha Fly
- Creeping Peeper
- Acrobatic Cheerleader (hopefully I don’t have to play this in WU!)
s for matchup positioning, WU Eerie is a classic tempo deck. Sometimes you curve out with creatures into Meat Locker // Drowned Diner and run your opponent over. Other times you play some removal spells and Glimmerbursts before drawing your bomb and winning with that. Stay flexible, and try to sculpt your gameplan to the circumstances of the game you find yourself in. You’ll want to be sequencing carefully to maximize eerie triggers from Gremlin Tamer either way.
Trophy Example

Playing Against It
Timely removal spells are important, as keeping Gremlin Tamer off the table makes life so much easier against this deck. If you don’t have it, you can sometimes buy time by holding back manifests and going over the top of WU. Be careful racing this deck, as it has a number of tempo effects like Fear of Immobility, Vanish from Sight, and Meat Locker // Drowned Diner as its disposal. Sweepers also offer a strong way to catch up against Gremlin Tamer; even something like Let's Play a Game could do the trick.
RG Delirium
RG is a strong aggressive strategy that just needs a bit of help filling up its graveyard first. This can lead to slightly uneven draws, though RG’s nut draws are pretty scary when they come together. It also has more tools for grinding out games than most aggro decks, as well as one of the most snowbally Limited cards I’ve ever seen.
Payoffs


Beastie Beatdown and Wildfire Wickerfolk aren’t subtle, but that doesn’t make them any less brutal. Beastie Beatdown is particularly unbelievable when it works, as the extra sizing makes Rabid Bite an almost universal removal spell. Besides those obvious ones, RG has a number of exciting higher rarity cards like Fear of Burning Alive, Fear of Missing Out, Balustrade Wurm, and Omnivorous Flytrap that are potentially at its disposal. Patchwork Beastie is also at its best in this archetype, both as a cheap beater and early source of delirium.
Key Cards
Two of the most important commons for the deck are Spineseeker Centipede and Say Its Name. Beyond those, it’s important to have a nice mix of permanent types, so some cards for each I’d recommend are:
- Wary Watchdog, Hand That Feeds, Flesh Burrower, etc. for creatures.
- Clockwork Percussionist, Found Footage, or even Bear Trap for artifacts.
- Ticket Booth // Tunnel of Hate, Glassworks // Shattered Hall for enchantments (note that these won’t bin themselves, but you may mill them to Say Its Name or surveil).
- Manifest Dread, Say Its Name, Monstrous Emergence, Grab the Prize for sorceries.
- Scorching Dragonfire, Impossible Inferno, Turn Inside Out for instants.
Lands can be milled or discarded, and you should consider it in deckbuilding as a byproduct of cards like Wary Watchdog, Say Its Name, or Grab the Prize. One thing I’ve noticed a bit is that most of my RG decks have been binning creatures, lands, and sorceries more than other types, so count your types carefully and try to play a good balance of cards.
Trophy Example

Playing Against It
There’s not much graveyard hate in the format, so playing against RG is usually about surviving the onslaught and not getting blown out by pump spells like Violent Urge and Turn Inside Out. Being able to trade with early threats in combat frees up removal to answer bigger beaters like Balustrade Wurm later. You can sometimes delay their delirium with exiling removal spells like Scorching Dragonfire and Final Vengeance, too. If you’re lucky enough to have it, Ghost Vacuum does a great job of turning off delirium.
GU Manifest
GU manifest is a strong midrange deck that has easily been my best friend in the format so far. If you don’t believe me, a substantial portion of my trophies in my trophy thread are this archetype. It usually takes the grindy role in most matchups, but it also packs enough creatures and pressure not to be wholly passive.
Payoffs


Oblivious Bookworm and Growing Dread are excellent signposts. There are also several other strong uncommons for this archetype like Paranormal Analyst, Unnerving Grasp, Under the Skin, and Threats Around Every Corner. I could also list Valgavoth's Onslaught here (as it does manifest), but that feels like cheating since it’s the best card in every deck! Abhorrent Oculus also deserves a nod as the premier Simic card, especially when you consider how unbeatable it is once manifested.
Key Cards


If you have the right payoffs, almost everything that says “manifest” should be played in this deck. GU is notably the only deck in the format that wants Cryptid Inspector, which has no real home outside of this archetype. GU also has an easier time splashing other colors than just about any other archetype, as it has blue card draw/surveil and green mana fixers like Spineseeker Centipede. Some cards I’ve really liked in GU (besides obvious top commons/staples) are Twist Reality, Underwater Tunnel // Slimy Aquarium, and Bashful Beastie.
Trophy Example

Playing Against It
Get ready for a grind. As with WU Eerie, step one is often killing Oblivious Bookworm, but cards like Under the Skin and Say Its Name can rebuy it sometimes. Unlike in most formats, GU’s removal is perfectly fine in Duskmourn, with Unable to Scream and Monstrous Emergence both being pretty respectable. You’ll also need to respect Twist Reality here, as this is probably the best archetype for that card. The tips I gave earlier against manifested cards can be vital to winning this matchup.
BR Sacrifice
BR Sacrifice is a fun archetype that’s a bit slower than usual Rakdos fare. Though we’ve often seen this kind of archetype before, something about Duskmourn’s take on BR just feels grinder than most sets. I’ve really loved its matchup against the top two decks, as a good BR deck just feels like it has infinite removal sometimes. On the other hand, it can be difficult to correctly balance fodder, sacrifice cards, removal spells, and generic big threats in this archetype.
Payoffs


The core gameplay loop of BR is all about sacrificing things for value to cards like Disturbing Mirth and Sawblade Skinripper. Disturbing Mirth notably is only good if you can sacrifice it as well, since the base rate without the bottom rider text is just “BR Village Rites at sorcery.” If you can keep the sacrifice flowing though, the chains can be quite impressive. Some other cards that obviously work well in this archetype are Come Back Wrong, Popular Egotist, Betrayer's Bargain, Diversion Specialist, and Saw. Vengeful Possession is also notable for classic threaten + sacrifice shenanigans.
Key Cards


There are three kinds of cards you’re looking to sacrifice; rooms, certain auras, and fodder creatures like Innocuous Rat and Clockwork Percussionist. Fear of Lost Teeth is also good fodder. The auras you’ll want to sacrifice are Cracked Skull and Sporogenic Infection, which are both like “spells” that leave a novel enchantment behind. You can also combine both with ping effects like Fear of Lost Teeth and Boilerbilges Ripper to make use of their actual text.
Balancing all of this can be tricky, so I encourage you to use the trophy example below (plus my builds on Twitter) for inspiration. It took some failed attempts, but I think I now have a good feel for the deck. One pointer is to try to include a couple of fat cycling creatures if you can, as BR is better at leveraging them than most decks. Games often go long due to all your removal, so having larger creatures makes a good deal of sense.
Trophy Example

Playing Against It
Card advantage is key, as BR is very much looking to whittle you down and exchange resources as much as possible. You can’t usually lean on any one single threat due to the power of cards like Final Vengeance (don’t forget it exiles!). Blue countermagic like Twist Reality and Don't Make a Sound can sometimes disrupt BR’s value setups, which are inherently telegraphed.
BG Delirium
BG Delirium acts as the more controlling end of delirium in this format. Combining black’s removal with green’s card advantage, self-mill, and creature quality is a decent recipe for success in Duskmourn.
Payoffs


BG has great signpost uncommons in Broodspinner and Drag to the Roots. It also has an insane rare in its colors (The Swarmweaver) and some cool other payoffs like Let's Play a Game and the ones that overlap with RG. Broodspinner is probably the most important card though, as it does double duty as an enabler/late game threat here.
Key Cards
Balancing a good mix of 2-for-1s, mana curve, removal spells, and diverse card types is the key to success with BG delirium. It also does a great job of splashing other colors, often either blue for bombs or red for other delirium payoffs (or just more bombs). Spineseeker Centipede is of course an all-star. Black makes getting good instants easier than in RG thanks to Murder and Winter's Intervention. Lean on green to provide the sorceries with Say Its Name and Manifest Dread.
Trophy Example

Playing Against It
As with RG, there isn’t much raw graveyard hate to lean on beyond Ghost Vacuum and a handful of exiling effects. BG won’t put you under nearly as much pressure, and instead you’ll likely find your matches to be all about bombs and/or card advantage. Broodspinner is one of their main threats, though you’ll occasionally have some time to ignore it if they’re slow to build up delirium. Lining up your removal spells correctly is easier here than against RG due to BG’s sluggishness in most games.
GW Survival
GW Survival is the first deck I’ve covered that I have mixed feelings about. While the concept of the deck is pretty neat, in practice it has a couple of problems:
- Survival inherently feels win more, as it tends to do the most when things are already going well. In rough games, survival sometimes just feels like flavor text.
- Even with clever ways to trigger survival like Baseball Bat or Fear of Immobility, you’re still tapping potential blockers that were not big enough to survive an attack.
- Most of the real payoffs for this mechanic are uncommon or rare, which means that the deck can fail to come together sometimes even if GW is open. Getting every Acrobatic Cheerleader and Cautious Survivor your table opened doesn’t make your GW deck great, unfortunately.
Not all is bad for GW though, as the deck’s mediocre reputation can lead to its best cards going quite late. There are also some powerful ways (usually at higher rarities) to make the survival mechanic rather convenient.
Payoffs


Shrewd Storyteller, Defiant Survivor, Glimmer Seeker, House Cartographer, Savior of the Small, and Rootwise Survivor are all pretty decent cards with tangible rewards for survival. There are also a handful of survival rares, the best of which is Rip, Spawn Hunter, which should draw 1-2 cards each time you survive with it. Getting these creatures tapped consistently can be done in a number of ways, but some of the best higher rarity ones include:
- Unidentified Hovership
- Hedge Shredder
- Enduring Vitality
- Baseball Bat
- Orphans of the Wheat
- Fear of Exposure
Key Cards


The higher rarity payoffs really make GW Survival as an archetype, but it does have a number of important commons as well. Flesh Burrower, Hardened Escort, and Fear of Immobility are filler creatures that also synergize with the deck’s core mechanic. I’ve also liked playing a couple pump spells like Jump Scare, Horrid Vigor, and Frantic Strength. The common survival creatures are also at their best here, though neither is exceptional.
One last thing to note about GW is that the survival mechanic can sometimes just be a bonus in a more “normal” aggressive strategy. A good curve of dudes and pump spells backed by a couple of Trapped in the Screen is a real gameplan, so don’t think that you’ll always need to get clever with ways to tap your guys. Bashing face is your primary gameplan; everything else is just contingency!
Trophy Example

Credit to Twitter user HeadologyMtG, as this is the only archetype I haven’t trophied with yet!
Playing Against It
Removal spells have never been better than against GW Survival. Most of their exciting payoffs are very killable, and getting rid of those tends to leave them top-decking lands and unimpressive curve filler. Aggro decks can also punish GW, as they’re usually faster and can force the deck into the awkward position of having to block with creatures they’d much rather be tapping.
UR Rooms
UR Rooms is a cool archetype built around the smash hit new enchantment subtype, rooms. While coolness definitely counts, UR also has two unfortunate problems in this format:
- It can be slow to set up, as most rooms are slightly overcharging you for the flexibility and eerie triggers they provide.
- The deck has some inherent de-synergy built into it; if you don’t believe me, read Intruding Soulrager and Smoky Lounge // Misty Salon. One card wants you to keep as many rooms as possible in play, while the other wants to eat them for value!
Payoffs


UR is tied with UB for the title of “mopeyest signposts in the format.” Smoky Lounge // Misty Salon has potential but requires a ton of rooms to really pay off. Intruding Soulrager is usually better in my opinion, as it has a reasonable baseline and plays great with rooms like Glassworks // Shattered Hall and Underwater Tunnel // Slimy Aquarium (which can be disposed of after getting the “card” from them). One thing to note is that while rooms are great in Duskmourn, there are few other direct payoffs for Rooms as Rooms. Other than eerie creatures (which obviously play well in this archetype), Central Elevator // Promising Stairs is just about the only thing that really rewards you for going deep on stacking rooms.
Key Cards


Rooms are obviously good, especially the best ones like Glassworks // Shattered Hall (which I’d play practically any number of in this archetype). As for creatures, Stalked Researcher, Creeping Peeper, and Rampaging Soulrager make for decent early game filler. I also don’t mind playing a copy of Boilerbilges Ripper, as you’ll very often have something convenient to sacrifice to it. Glimmerburst and Meat Locker // Drowned Diner are essential mana sinks, with raw card draw providing the necessary resources to play and win a longer game.
UR isn’t a wholly passive deck, and it can turn the corner once it’s stabilized surprisingly fast with combinations like Rampaging Soulrager plus Ticket Booth // Tunnel of Hate.
Trophy Example

Playing Against It
Anthropede’s time has come, though it’s by no means necessary to beat up on this archetype. Enchantment removal effects in general are often good against UR, not just for rooms but also for Unable to Scream, which is their best answer to fatties. Playing around Glassworks // Shattered Hall is often key, so try to make deploying it awkward for your opponent if you can. If your opponent has Central Elevator // Promising Stairs, you’ll need to take an aggressive posture in the matchup (or have room destruction prepared), as they’ll certainly have inevitability.
WB Reanimator
WB Reanimator has incredible signpost uncommons, but it struggles to consistently execute its game plan for a number of reasons. In practice, the deck’s problems are:
- There aren’t many big creatures to bin in Duskmourn, with the exciting ones mostly being limited to Shroudstomper, Fear of Abduction, Vile Mutilator, and (if you’re lucky) Valgavoth, Terror Eater.
- Binning cards is also a challenge for WB, as discarding or milling fatties is difficult in these colors. Your tools for this are mostly limited to three commons, random “surveil 1” triggers, and some (great) uncommons.
Not all is bad for WB though, as it has the best removal of any color pair and plenty of reanimation spells to choose from. I’ve come to think of the archetype as more of a “control deck with a reanimation subtheme” than a pure reanimator strategy. You may even find yourself using your reanimation spells after you’ve hardcast Shroudstomper!
Payoffs


BW’s signposts are among the best in the format, strange given that it finds itself listed as a “mediocre” archetype! Shroudstomper and Rite of the Moth are both inherent 2-for-1s, and they help to give WB serious late game power. Note that reanimation spells bypass “additional cost to cast” text from fatties like Fear of Abduction and Vile Mutilator. Live or Die and Valgavoth's Faithful offer additional reanimation support, with Live or Die even letting you ambush blockers at instant speed.
Key Cards


Emerge from the Cocoon is a serviceable common reanimation spell that no one else should want. You don’t always have to prioritize it, but it’s almost as good as most of the uncommon ones. As for enablers, your best tools for getting creatures into your graveyard are:
You can also make use of surveil from cards like Fear of Surveillance and Appendage Amalgam, which make for reasonable filler in WB. Removal spells are also very important for this archetype, as it needs to buy time to set up its reanimation game.
One last important point is that WB makes excellent use of common 6-drop cycling creatures (Shepherding Spirits and Spectral Snatcher), which help you hit your land drops and ensure that you always have a target for Emerge from the Cocoon if need be. I often find myself playing multiple copies of them here while only playing 0-1 in other archetypes.
Trophy Example

Playing Against It
Ghost Vacuum is just mean here, as it completely turns off their gameplan for the low cost of 1 mana. I haven’t been unlucky enough to play against that one in WB yet, though. Outside of Ghost Vacuum, I’d highly recommend unconditional removal and counterspells if you have them. BW is slow to start in most games, but it has great tools for a long game and lots of removal to drag games out to its preferred pace. Sticking a lead while having an answer prepared for their next big play is a good way to beat WB.
UB Eerie
The last archetype is kind of like the ugly stepsister of WU Eerie. Whereas WU is all about playing busted uncommons and snowballing to victory, UB Eerie is forced to grind out small, incremental advantages. It has the tools to do this, but its specific payoffs are among the most mild that the format has to offer.
Payoffs


Skullsnap Nuisance is a decent blocker with free card selection, which would be impressive if you forget that cards like Oblivious Bookworm, Gremlin Tamer, and Arabella, Abandoned Doll are in the same set. It’s not a bad card here, but it acts as good filler rather than a real incentive to be UB. Fear of Infinity is a bit more exciting, and it can be a real piece of card advantage with the right setups. You can get the most out of Fear of Infinity by playing it with surveil and discard effects like Fanatic of the Harrowing. I’ve also loved the combination of Defiled Crypt // Cadaver Lab and Fear of Infinity, which can bury your opponent in 2/2s.
Dashing Bloodsucker has also impressed in this archetype, as it’s resilient to many removal spells (including Glassworks // Shattered Hall) and capable of gaining a lot of life. UB also loves bomb rares like Unholy Annex // Ritual Chamber and Roaring Furnace // Steaming Sauna that help it win at parity.
Key Cards
You’re definitely building a control deck when you're in UB, so try to assemble a nice mix of removal spells, early blockers, counterspells, and card advantage. Glimmerburst is the most important common, followed by efficient removal like Murder, Unable to Scream, and Winter's Intervention. You’ll have some flexibility with the creatures you play, though the best ones are usually beefy walls like Stalked Researcher.
Trophy Example

Playing Against It
Card advantage is the name of the game, as outvaluing UB pretty much invalidates their entire game plan. GU Manifest is the best archetype for this, especially if you can keep an Oblivious Bookworm on the table. You can also just try bashing UB to death, as they won’t always have answers for everything you play on curve. Ghost Vacuum can also invalidate Fear of Infinity loops if you’re lucky enough to have it.
Unofficial Archetypes
Duskmourn has enough depth that you aren’t just limited to a handful of on-rails archetypes. This isn’t an exhaustive list of other things you can do, but it cover a couple of decks I’ve built/played against that seemed notable.
Abzan Graveyard
If you read some of the design articles for Duskmourn, one thing that WotC noted is that WB reanimation was intentionally tilted white to avoid reanimator decks just being mono-black + splashes. You can see this on Shroudstomper (WW), Rite of the Moth (WW flashback), and Emerge from the Cocoon (only common reanimation spell is in white). However, WB Reanimator suffers from lacking a critical mass of enablers, which creates room for rogue decks like WBG to shine.
The basic gist of WBG is to get the best of both Shroudstomper and Broodspinner by making use of green’s excellent graveyard enablers. Between Spineseeker Centipede, Moldering Gym // Weight Room, Terramorphic Expanse, Slavering Branchsnapper, and dual lands, there’s enough mana fixing to be truly 3-color, which is a requirement given that you’ll be base G with BB and WW costs. This lets you take full advantage of delirium and reanimation synergies, which can be set up with the exact same cards (i.e. Say Its Name and Commune with Evil).
While the power of this archetype is impressive, the main drawback it has is consistency. Greed can come with untimely taplands, slightly more mulligans, and occasional color issues that might cost you the game against aggressive decks. I view this archetype primarily as a greedy type of splash in BG Delirium, though it’s come up often enough that I wanted to mention it.

5c Marina Vendrell
Marina Vendrell is a really cool card that you usually won’t be able to build a deck around. While the power level here is tempting, 5c is very difficult and forces you to spend a lot of picks on lands. It’s difficult to do this while hitting a necessary quantity of enchantments for Marina Vendrell to actually be worth the effort. With 10 enchantments for example, Marina Vendrell has about a 90~% chance not to brick and a 57~% chance to hit 2+ enchantments. Adding more enchantments obviously makes these numbers better, and you’d really like to play as many enchantments/rooms as possible with Marina Vendrell.
While I can’t recommend drafting Marina Vendrell if you’re purely interested in winning, it’ll table sometimes, and it is possible to pull it off!
The base of a Marina deck is always Gx for fixing. Because green is the least enchantment-centric color, good green enchantments like Moldering Gym // Weight Room are premium here.
Almost all rooms are good in this deck, but especially the obvious ones that act as removal like Glassworks // Shattered Hall.
The same goes for enchantments, with the best ones being removal spells like Unable to Scream, Trapped in the Screen, and Nowhere to Run.
This is also a great home for Grasping Longneck, which is usually filler at best in other decks.
Most Marina decks are best described as 2c + three splashes or 3c + two splashes. My trophy example below is Bant + 1 Swamp/Mountain and duals for Roaring Furnace // Steaming Sauna and two copies of Marina Vendrell.
Because you’re often 2c base, your Marina deck often touches on the synergies of whatever your base archetype is. GU Marina decks in particular can take advantage of the fact that manifest payoffs like Growing Dread and Threats Around Every Corner are enchantments.
I also recommend a copy or two of Say Its Name if you can fit it, as buying back Marina Vendrell after it dies (or if you mill it to manifest) can be a game winning. Most decks just can’t handle the raw card advantage it provides.
Lastly, don’t forget that Marina Vendrell can lock and unlock rooms every turn. I was able to loop Roaring Furnace over and over until my opponent conceded!

Blue Mill
The Mindskinner and Scrabbling Skullcrab are a lonely pair but can be the basis of a fringe mill strategy. This is a dangerous deck to go halfway on, as milling your opponent for only a few cards often helps them due to delirium. There are two main ways to build a mill deck (or rather, add a mill subtheme to your deck):
- Being base blue and getting handed The Mindskinner, which asks you to play 13~ or so Islands in exchange for practically winning the game in two unblockable attacks.
- Drafting multiple Scrabbling Skullcrabs, which are weak on their own but very dangerous in multiples.
This is the kind of thing I have yet to do in Duskmourn, though I have had the unfortunate experience of losing to The Mindskinner a couple of times. It isn’t always worth weighting your mana base for it, but certain decks seriously struggle to beat it. Scrabbling Skullcrab is much less vulnerable to removal and pressures your mana base less, but the requirement to have multiples of the same uncommon is a difficult one. Either way, it’s good to keep in mind that the option exists. Cathartic Parting and Malevolent Chandelier are the only direct ways to fight mill in the set, and neither seems particularly unbeatable (unlike say Gaea's Blessing).
Card Specific Tips
Think of this as a “miscellaneous” section where I give my thoughts on how to best build/play specific cards. I’ll try to avoid repeating myself, so most of these focus on cards I didn’t cover above that also aren’t central/obvious to the big 10 archetypes.

Mirror Room // Fractured Realm isn’t usually a great rare, as Fractured Hall is too expensive and Mirror Image is a card that I wouldn’t be excited to play on its own. It does however go absolutely crazy with Ghostly Dancers, which immediately unlocks Fractured Realm and starts producing an unbeatable swarm of 3/1s.

Funeral Room // Awakening Hall is similar to Mirror Room // Fractured Realm in that the first room is too weak while the second room is usually too expensive. One way to get around this is with Keys to the House, which can unlock Awakening Hall for less than half of the mana!

Meathook Massacre II hasn’t impressed me at all. I dragged it in the Sealed Guide, played with it once afterwards, and somehow feel even worse about it now. Six mana Innocent Blood for BBBB is just comically bad, and the static abilities do little to make up for this.

Someday I’d like to cheat Valgavoth, Terror Eater out with Hauntwoods Shrieker or Kona, Rescue Beastie. It probably won’t happen, but a man can dream.

Split Up is fantastic with survival enabler cards like Fear of Immobility and can make for a one-sided Plague Wind if you do it right.

Toby, Beastie Befriender is an excellent rare in general, but it gets even better with Midnight Mayhem for surprise flying/haste attacks.
Come Back Wrong has excellent synergy with cards like Final Vengeance. You can also target your own creatures to repeat ETB effects. I once won a game this way by killing my own Fear of Burning Alive for lethal!

I haven’t played with Demonic Counsel yet, but it seems like a reasonable inclusion if you have good demons and a lot of self-mill. Given that it’ll go late in drafts, I expect this’ll happen at some point.

Cursed Recording is a tough sell for a build-around in a set like this, as the issue is more “having enough good instants and sorceries” rather than dying to it. Too many of the would-be spells in Duskmourn are actually just rooms/enchantments!

Waltz of Rage has excellent synergy with Flesh Burrower, fatties, and your own fodder creatures like Clockwork Percussionist and Innocuous Rat. I’ve already been blown out by an end of turn flip manifest into Bedhead Beastie into Waltz of Rage for an unexpected Plague Wind.

Restricted Office // Lecture Hall is notable for its synergy with and against the set’s “2 power or less” subtheme. I’d probably start it in a vacuum, but be ready to board it out frequently (in BO3 at least).

Undead Sprinter makes for a nasty combo with Defiled Crypt // Cadaver Lab, as recurring it is simple and an easy path to many 2/2s.

The Jolly Balloon Man is a strong rare that excels in RW Aggro or BR Sacrifice decks (as a splash). It pairs best with “enters” or “dies” creatures like Unsettling Twins, Clockwork Percussionist, and Innocuous Rat. Another (usually bad) card you could try pairing it with is Attack-in-the-Box, which would amount to a 1-mana flying Lava Axe every single turn!

Ghost Vacuum is a great hate card that works as a win condition for control decks. My theory for it at the moment is to start it in all but the most aggressive decks, but sideboard it out when I want neither graveyard hate or a slow engine card.

Valgavoth's Lair is the only land in the set that can trigger eerie creatures. It’s not the most remarkable card or anything, but drawing a card after playing a land with Entity Tracker is a great feeling.
Playing Fear of Abduction correctly is tricky. The best targets for your own creature are usually small value creatures, while for your opponent you’re looking to exile a token or fattie in most cases. Your manifests can also make for good targets to exile, as you can threaten to get back whatever was face-down as an “insurance policy” for if your alien dies.

Duskmourn's Domination seemed terrible to me at first, though I’ve warmed up to it a bit now. It’s not for every match-up, but it makes for a great answer to fatties like Shroudstomper and the 6-drop cycling creatures.

Stay Hidden, Stay Silent’s second mode is only at sorcery speed; don’t make the mistake I did of trying to do it at my opponent’s end step! I’d also be careful not to use this card against survival creatures, as it pretty much does their job for them. It’s a great removal spell for everything else though.

Cynical Loner is a powerful graveyard enabler that unfortunately struggles to get through in most games. I’ve been caught by the “can’t be blocked by glimmers” text once, but for the most part this is too volatile to be reliable in decks like WB.
Sporogenic Infection has a lot of play to it. You can target your own creatures to edict your opponent’s only creature or target one of your opponent’s creatures to force them to sacrifice another. You can also set up dirty sequences with ping effects to take out your opponent’s two best creatures at once.

Defiled Crypt // Cadaver Lab has been mentioned a couple of times already, but it’s worth noting some other cards it works well with. These include Say Its Name, reanimation spells, Savior of the Small, and Surgical Suite // Hospital Room.
Diversion Specialist says “this turn,” so be careful using it as most of the other impulsive draw effects in Duskmourn are “next turn.” Always plan out your turns with this in advance so that you don’t accidentally miss value from exile.

Fear of Being Hunted has excellent synergy with cards like Most Valuable Slayer and Ticket Booth // Tunnel of Hate, which let it safely eat creatures out of nowhere. I’ve also lost Paranormal Analyst and Valgavoth's Faithful to this card occasionally.

Norin, Swift Survivalist is a good aggressive card that has neat synergy with manifests. If your opponent blocks your face-down creatures, you can exile them and cast them from exile. I haven’t seen this come up yet, but Unsettling Twins makes this a real possibility.
Razorkin Hordecaller has really impressed, though I should have probably known that it would be good; it’s basically Éomer of the Riddermark after all!

Trial of Agony is playable in aggressive decks, which are more likely to want “: kill your opponent’s second-best creature, their best creature can’t block.” Stay far away from this in anything that isn’t aggressive though.

Untimely Malfunction is a neat card that’s basically Swerve + Shatter + a mini Falter. It hasn’t usually made my decks, but I reserve the right to get blown out by this at some point in the future.

Cathartic Parting can loop with a second copy of itself or Malevolent Chandelier. My grindy decks have yet to need this kind of setup, but it’s good to remember that it exists (especially in BO3).
Drafting Tips
Bombs and signposts are vital! I often spend my first few picks of Duskmourn drafts just taking the best card and trying to stay open. While examining options in each pack, ask yourself these kinds of questions:
- What’s the best card in the pack?
- Does this go well in the archetype it would put me in?
- Is this worth splashing?
- Will not taking this send signals to other drafters (relevant with gold cards)?
- How late is this?
One thing I often find myself doing is “building multiple decks at once” in the early stages of a draft. Let’s say you start with Unnerving Grasp and Glimmerburst then see a pack with Scorching Dragonfire and Trapped in the Screen as the best cards.
- If you take Trapped in the Screen, you’re envisioning your third card as a WU Eerie deck, where everything makes sense.
- The same goes for taking Scorching Dragonfire, as all the cards would work in UR Rooms.
This equation becomes more interesting as you keep picking cards since certain cards don’t work well in every archetype. Survivors for instance are only great if you have combat tricks/ways to tap them, and Say Its Name is no longer premium in decks that don’t care about graveyards/delirium.
One thing I must note is that this guide is already quite long, so while I can’t go exhaustively into my draft heuristics here, I recommend checking out my Twitter/X thread for draft logs if you need help.
Wrap Up

Diversion Specialist | Illustration by Tuan Duong Chu
And with all that, we have finally escaped that blasted haunted house… at least for now. Fear not though, we’ll be out for good soon when Foundations releases. That’s right, we have yet another draft set coming in just one month! Given that I’ve actually enjoyed Duskmourn quite a bit, I can’t say whether that’s a good thing, but either way, it’s hard for me to complain about more Magic.
What are your thoughts on the DSK Draft environment? Which archetypes do you like to draft? Let me know in the comments below, and don’t forget to come join the Draftsim Discord.
Until next time, may you open Valgavoth's Onslaught every single draft!
Follow Draftsim for awesome articles and set updates:


2 Comments
Hi – I am trying to read the cards for your RW Trophy example but the text is too small, and I would love to try out that deck! Is there somewhere I can download that? Thank you! Your site is awesome and very helpful.
Heyya, the images definitely aren’t ideal here, something we’ll work on for future Draft Guides.
Bryan left a link to his trophy threat on Twitter/X, where you can see more of his trophy decks with better images. It’s linked in the article, but you can also find it here: https://x.com/Veveil/status/1838976323173089520
Add Comment