Last updated on June 28, 2025
Mimic | Illustration by Scott Murphy
As Magic’s first foray into another universe, Adventures in the Forgotten Realms is a very unique thematic set. Long-time D&D fans will enjoy many references to characters, monsters, and spells that they’ve played with.
In terms of draft gameplay, AFR plays a bit more straightforward than its setting suggests. Dungeons are the only new mechanic with substantial gameplay implications, and many of the color pairs behave about as you’d expect them to (i.e., Simic ramps/gets value, Gruul smashes face, etc.). This makes sense when you remember that AFR replaced the Core Set this year.
And there’s nothing wrong with this! Magic is a great game when it sticks to its fundamentals, and there are still plenty of interesting cards and archetypes to talk about. So without further ado, let’s venture into the Forgotten Realms together.
Forgotten Realms Mechanics
Fifty Feet of Rope | Illustration by Andrew Mar
Wizards already covered the basics of Forgotten Realms’ mechanics. Rather than rehashing the same info, I’ll expand on these segments and cover things I think WotC missed.
Dungeons/Venture
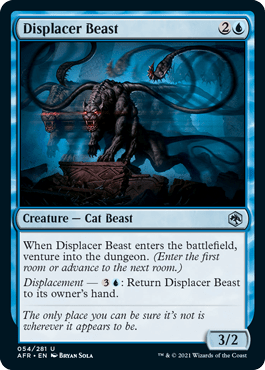
Dungeons are the most unique mechanic in the set and greatly affect card evaluations, gameplay, deckbuilding, and drafting. You descend into dungeons with the venture mechanic, which appears on lots of cards in various different ways (i.e., venture when ETB, venture on attack, pay (3) and tap to venture, etc.).
Venture appears in every color, though red barely has any and green’s venture is mostly tied to its higher rarity cards. Black ventures the most and also has the best venture common in Precipitous Drop.
As you likely know, there are three dungeons in the set: Dungeon of the Mad Mage, Lost Mine of Phandelver, and Tomb of Annihilation. There’s no universal “best” dungeon as each excels in different situations. Let’s take a look at each of them individually, shall we?
Lost Mine of Phandelver
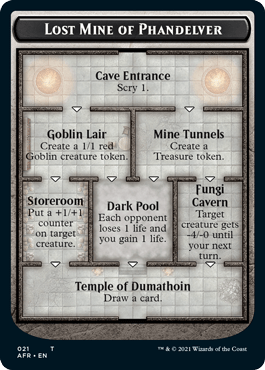
While I said there’s no true “best dungeon,” there’s certainly a most commonly picked one which would be none other than Lost Mine of Phandelver. This is largely because Phandelver has the best Level 1 mode.
In a vacuum, scry 1 is better than gaining one life or having each player lose one life. The rest of Phandelver’s modes are decently useful and the entire dungeon can be completed in just four ventures. It’s also the most impactful dungeon if you can’t finish it, making the Lost Mine a popular choice for decks with only a few incidental venture cards.
Cave Entry
Nothing to say here. Scry 1 is always going to be nice, early or late. Early game you can find extra lands or try to mitigate a flood, and later on you’ll almost always be bottoming lands. From here you have a choice to go into…
Goblin Lair or Mine Tunnels
Goblin Lair is a superior choice when you’re flooded, need a chump blocker, need to trade with an x/1, or want something to wear equipment.
Mine Tunnels is better when you’re land light, trying to ramp into a big spell, or need color fixing.
Keep in mind that if you choose Goblin Lair, you can’t go into Fungi Cavern. The same goes for Mine Tunnels and Storeroom. You should consider this choice carefully as it affects both this venture and the next.
Storeroom
This is a small but useful bonus, particularly if you’re pressuring your opponent. This can let you outsize a blocker or pump a small evasive creature like Ranger's Hawk. Using Storeroom as a surprise combat trick is basically impossible since the only way to venture at instant speed is Bar the Gate.
Fungi Cavern
This is a decent “lifegain” effect since -4/0 basically negates an attack on its own, especially early in the game. This is particularly appreciated as Mine Tunnels doesn’t affect the board. As with Storeroom, you shouldn’t expect to use this as a combat trick since no venture cards have the right timing to do that.
Dark Pool
This is almost never a better choice than Storeroom, but it can be better than Fungi Cavern when you’re ahead on board and have no use for a temporary -4/-0. The exception of course is if one damage from Dark Pool is lethal.
Temple of Dumathoin
“Draw a card” is a simple but nice payoff for completing Phandelver, and you can basically view the Lost Mine as worth about 1.3ish cards in total when you consider all of its effects.
Dungeon of the Mad Mage
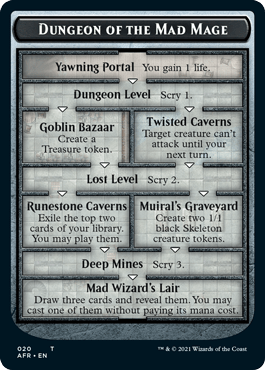
Dungeon of the Mad Mage is the slowest dungeon to complete, requiring seven ventures to get to the Mad Wizard’s Lair. As you might expect, this means that it carries the greatest rewards. Its finale of “draw three and cast one for free” is just plain seductive, particularly with scry 3 above it. The dungeon’s early modes are admittedly underpowered compared to Lost Mine of Phandelver, which makes this a poor choice in decks without a critical density of venture cards.
Yawning Portal
The most interesting thing about Yawning Portal is pairing it with lifegain payoffs like Celestial Unicorn and Lurking Roper, although Selesnya decks without a heavy venture theme still might prefer Phandelver. This is a very minor bonus otherwise, but it’s better than nothing.
Dungeon Level
Phandelver would’ve had you making a 1/1 goblin or a Treasure by now, which demonstrates why the Lost Mine is better if you aren’t planning on venturing much. Scry 1 is still appreciated, though.
Goblin Bazaar or Twisted Caverns
Goblin Bazaar is a nice bonus when you aren’t under too much pressure. Decks that go into Mad Mage tend to have enough card advantage in the late game to appreciate extra mana lying around.
Twisted Caverns should be your more common choice. Disabling an attacker for a turn is a strong bonus for the type of durdly decks that want to go into this dungeon.
Lost Level
We’re finally starting to get to the good part. You could’ve finished Lost Mine of Phandelver or Tomb of Annihilation here, but you chose to invest in your future instead, and you’ll soon be rewarded for doing so. This mode can also help set up Runestone Caverns so you don’t waste any cards.
Runestone Caverns or Muiral’s Graveyard
This may not be clear upon reading it (it wasn’t for me), but the cards you draw from Runestone Caverns must be played immediately upon venturing into it. You can break timing restrictions on sorceries and lands this way (relevant if you attacked with a Planar Ally), but you must play them now and you must pay all relevant costs plus obey the “one land per turn” rule.
With that said, Runestone Caverns is the stronger option if you have a lot of mana or know that you can play two cards with it, most likely from the above scry 2. Venture-on-attack cards play well with Runestone Caverns since any ETB or activated ability venture cards reduce your options for playing cards in the temporary window.
You should go into Muiral’s Graveyard instead if you aren’t going to have much mana left over. Two free 1/1s are relevant for chump blocking and gumming up the board.
If you’re playing MTGO and not Arena, it’s worth noting that Runestone Caverns remains bugged as of July 27. Rather than having to play the top two cards immediately, they remain in exile for the rest of the game to be played at your leisure. This is a noticeable upgrade that makes Mad Mage (and by extension, venture decks) a bit stronger on MTGO than they would be otherwise.
Deep Mines
Scry 3 is a great bonus on its own and can almost feel like “draw a card” in the late game, but the most exciting part about Deep Mines is how it perfectly sets up…
Mad Wizard’s Lair
The grand finale! This is why you went into Mad Mage’s, after all, so it’s nice to finally get the payoff. As with Runestone Caverns, Mad Wizard’s Lair lets you cast a sorcery at times when you otherwise couldn’t. You’d ideally find something expensive to cast off this from the earlier scry 3, but drawing three with a free cast is pretty sweet regardless.
Tomb of Annihilation
Tomb of Annihilation is definitely the most unique dungeon. Lost Mine of Phandelver and Dungeon of the Mad Mage share a few modes and basically compete with each other; Phandelver is better early, Mad Mage is better later if you can pull it off.
The Tomb throws out such a rubric entirely. It’s 100% symmetrical (i.e., bad for both players) up until The Atropal or downright awful for you if you choose to go into Oubliette. Tomb of Annihilation excels when you’re ahead or aggressive since the symmetrical modes favor the player who’s currently winning.
This dungeon is also notable because of Acererak the Archlich, which must see a completed Tomb before you can keep it in play. If you’re lucky enough to have Acererak in your deck, you’ll likely be going into Tomb of Annihilation much more often.
Trapped Entry
I’ve dealt lethal with this at least twice now, so don’t forget that your venture cards can be weak burn spells late game. Realistically this is another minor bonus to whittle down your opponent's life total.
Veils of Fear and Sandfall Cell
Veils of Fear punishes the control player in the matchup since they’re more likely to have cards in hand and care about their life total than the aggressive player. Sandfall Cell is similar since the control player is more likely to care about sacrificing extra lands than the player trying to end the game.
You’ll be going into Veils and Sandfall about 99.9% of the time since Oubliette is extremely harsh. Also keep in mind that Sandfall Cell can act as a sacrifice effect for Price of Loyalty if you time it correctly.
Oubliette
This is not for the faint of heart. Oubliette is a crushing disadvantage early on and still rough as the game goes on. While a fast Atropal may be tempting, you should basically only go into Oubliette in specific late game scenarios or if you need a faster sac outlet for your Price of Loyalty setup. If you do go into Oubliette, try to empty your hand, control no artifacts, and have a weak creature to sacrifice.
Cradle of the Death God
A free 4/4 deathtouch is a great payoff and is worth more than “draw a card” in a vacuum. This extra threat might just be the nail in your opponent’s coffin if you’re ahead, which you likely should have been when you chose Tomb of Annihilation.
Dungeon Recap
Lost Mine of Phandelver is the best generic option, Dungeon of the Mad Mage is its slower but more rewarding sibling, and Tomb of Annihilation is great when you’re ahead or trying to punish your opponent’s stumble. Both Phandelver and Mad Mage can function as “colored sources” if you have enough venture cards, letting Azorius and Orzhov venture decks splash cards like Adult Gold Dragon somewhat reliably.
Pack Tactics
Pack tactics is a new and aggressive mechanic that appears on a fair number of red and green creatures. You achieve “pack tactics” whenever you attack with creatures that have total power of 6 or greater. Your opponent also can’t stop this trigger by killing, bouncing, or shrinking your attackers after they’ve been declared. Pack tactics is a flexible mechanic since going wide or tall can accomplish its aims.
Die Rolling
The Deck of Many Things | Illustration by Volkan Baga
Die rolling is an unusual sight in a black border set, but Forgotten Realms just wouldn’t have been a convincing D&D experience without D20s rolling around the table. This is a scary mechanic at first since people tend to tense up when they see hard variance on Magic cards, but just about every (non-rare) card that involves rolling dice is directionally similar regardless of die roll outcome.
Contact Other Plane will always draw cards, though its efficiency and strength varies based on luck. This is Izzet’s primary mechanic in draft and appears in every color but white in at least some form.
Classes
Another mechanic/flavor win in AFR are classes, a new subtype that appears on 12 different enchantments. These are powerful enchantments that can be leveled up as the game progresses by investing mana at sorcery speed.
There are no classes at common and two terrible ones for Limited (Sorcerer Class and Bard Class). The rest range from bomb rares (Paladin Class, Ranger Class) to solid playables (Wizard Class, Warlock Class).
Since there are only 12 classes, I’ll cover each one here.
Cleric Class
Best in Selesnya lifegain strategies, Cleric Class isn’t very good without a critical mass of lifegain effects. It’s a worthy build-around and can be quite powerful if you pull it off. Hopefully you’ll be lucky enough to get multiple Priest of Ancient Lores!
Paladin Class
Level 1 isn’t doing much, but level 2 is excellent and affordable. Level 3 ends the game in a couple of swings. Paladin Class is a true bomb rare!
Wizard Class
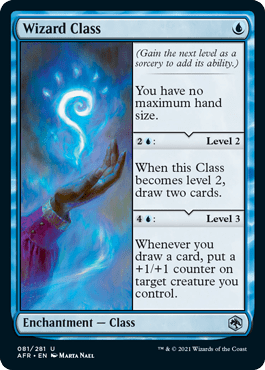
Wizard Class is a very solid class. Level 2 is a fairly costed Divination. Level 3 is definitely clunky but can provide a nice advantage if you find the time to pull it off.
Warlock Class
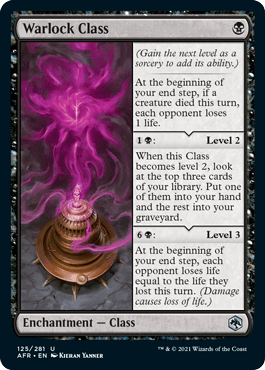
Getting the creature you invested in Warlock Class back is pretty easy since level 2 is only one black to pull off. Level 3 is very pricey but makes taking any damage dangerous for your opponent. A very solid class for any black deck.
Barbarian Class
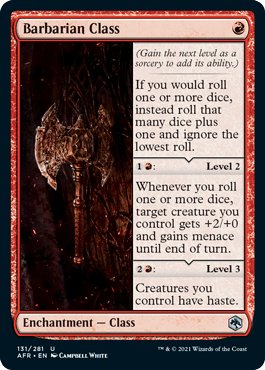
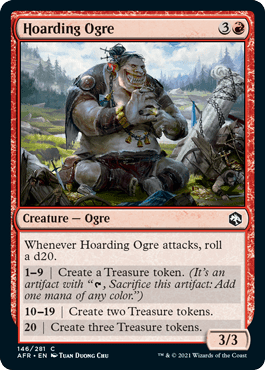
Barbarian Class is a powerful build-around if you can draft enough cards that say, “roll a die.” 90% of the time this will be in Izzet, though I’ve had a couple of Rakdos decks that had 9+ payoffs for this. Its particularly effective with Chaos Channeler and Hoarding Ogre since both creatures play much better with menace on attack.
Druid Class
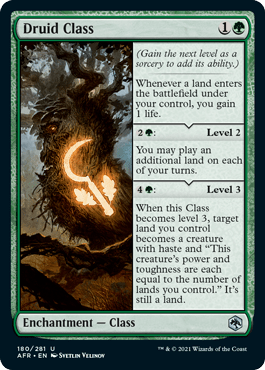
This is an odd mix of a life-gain-matters engine and ramp-deck payoff and excels in Simic and Selesnya decks. Try to play a higher land count than normal (18 to 19 instead of 16 to 17) when you play Druid Class since it really needs continuous land drops to do anything good.
Druid Class’ basic gameplay is a bit of early lifegain, an awkward but sometimes awesome level 2, and then you basically get the card you invested in it back later as a giant hasty X/X creature.
Ranger Class
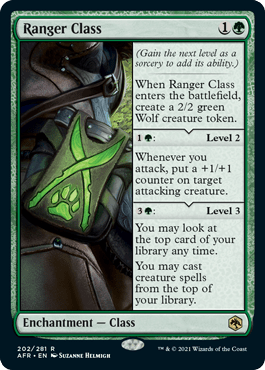
Gross bomb rare that starts with a 1G 2/2 that piles free value from there. Ranger Class is arguably the best class in the set and one of the best cards to open P1P1.
Monk Class
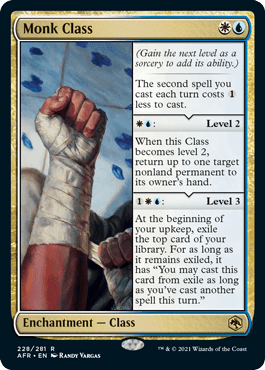
Monk Class is a strong value engine that wants you to play long games with lots of card draw and cheap spells. Level 2 helps buy time to set up level 3. The main weaknesses are that it’s multicolor and level 3 basically whiffs every time it hits a land. Try to scry a bit to mitigate that.
Rogue Class
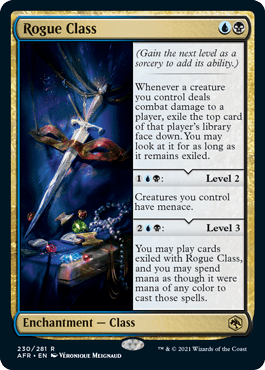
A thematic build-around for Dimir, Rogue Class plays best with a deck full of cheap evasive creatures and interaction. It provides all the card advantage you need and more, assuming you can consistently connect for damage. It’s a bit slow to get going but definitely powerful.
Bard Class
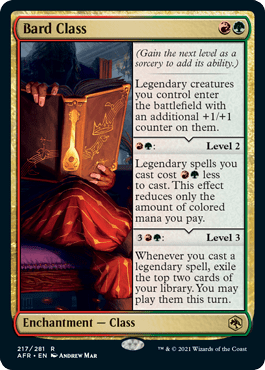
There aren’t nearly enough legendaries in Forgotten Realms for Bard Class to ever be worth playing. None of the modes do anything without legendary cards.
Sorcerer Class
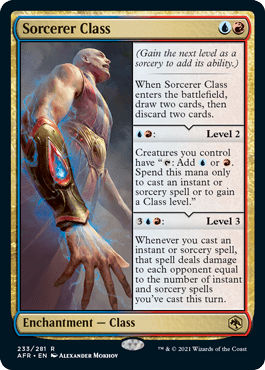
Sorcerer Class is better than the Bard, but still pretty terrible. Level 1 doesn’t get your card back, level 2 doesn’t do much either, and level 3 is difficult to pull off since it needs conflicting incentives without providing a strong reward. Best avoided!
Fighter Class
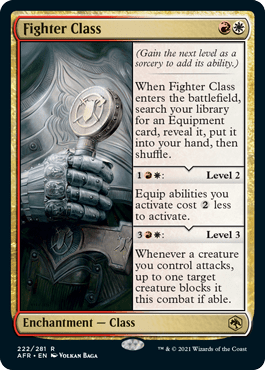
Level 1 gets you your card back immediately, which means that both other levels can be viewed as pure upside at your convenience. Fighter Class isn’t a true bomb but it is a solid draw towards Boros equipment.
Format Big Picture
Speed
Bag of Holding | Illustration by Evyn Fong
AFR is a fairly fast format, though it isn’t the most aggressive either. Ixalan, Zendikar, and Amonkhet are examples of faster formats. You don’t have to be the beatdown with every deck, but you do have to have a plan for receiving one.
The format has lots of solid 2-drops plus a high density of equipment to push cheap creatures through blockers. Even less aggressive decks may be playing cards like Hoard Robber and Soulknife Spy, which can make stumbling in AFR rather punishing.
If you can get past the early game and still be in one piece, you can enjoy the many larger creatures in this set and try to outclass your opponent’s earlier plays. Every color but white has a playable 6-drop at common, for instance. Of the 10 basic dual-color archetypes, Gruul and Boros are the fastest and most aggressive, and Simic is the slowest.
Prince or Pauper?
One concept developed by the Limited MTG community to evaluate formats is to describe a format as a “prince format” or a “pauper format.”
If you’re not familiar with the terminology, a prince format is dominated by higher rarity cards with a flat power level at common/uncommon and many unbeatable bomb rares. Cards like Glorybringer, Dream Trawler, Ethereal Absolution, etc.
By contrast, a “pauper” format is dominated by commons because of synergy, aggression, or efficient answers to large threats.
So how does AFR stack up by this metric? Well, it’s somewhere in the middle of the two. There are many obnoxious rares and mythics (five strong planeswalkers, Inferno of the Star Mounts, Xanathar, Guild Kingpin, Ranger Class, etc.) in AFR, but the format also loves to punish players with bad curves and mana bases. The fixing is also limited outside of Treasure, which means that most archetypes can’t splash every broken rare they’re handed in the draft.
What's the Best Color in AFR Draft?
Magic Missile | Illustration by PINDURSKI
My unscientific opinion of the best colors in AFR is as follows:
Red > Black > White > Green > Blue
Red is the best color because it has the best common in Dragon's Fire, strong aggressive creatures, decent other removal options, and one of the best uncommons in the set with Battle Cry Goblin. Its key themes are Treasure, goblins, equipment, damage-based removal, and general aggression.
Black is the next best color. It has the second best common (Grim Bounty) and some of the better early blockers/defensive creatures in the set. Black pairs particularly well with red thanks to Price of Loyalty plus sacrifice effects and overlapping Treasure synergies. Its key themes are removal, venture, gumming up the ground to buy time, Treasure, and sacrificing creatures.
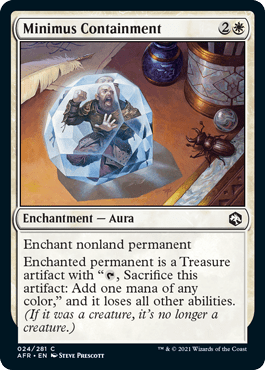
White is the second-best aggressive color. It’s best common is easily Priest of Ancient Lore, with the rest of its cards feeling somewhat even in power level. White can also be played as a defensive support color, though only a few white cards like Priest of Ancient Lore, Veteran Dungeoneer, You Hear Something on Watch, and Minimus Containment excel in this role. Its key themes are cheap creatures, lifegain, fliers, and venture.
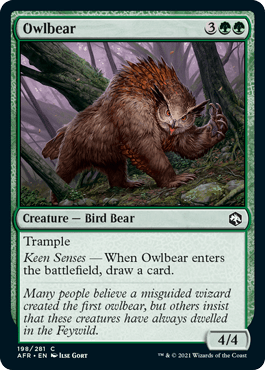
Green can be aggressive when paired with red or white, or more value-oriented when paired with blue or black. Owlbear is the best green common which means that green is usually looking to go over the top of its opponent rather than under them. Its key themes are huge creatures, mana acceleration, and pack tactics.
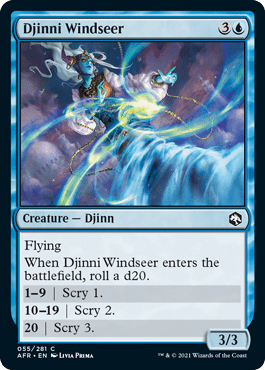
Blue is the weakest color in AFR. It’s glutted at three and lacks a common at Owlbear, Priest of Ancient Lore, or any of the premium removal’s level. Djinni Windseer is probably blue’s best common overall, although it dies to Dragon's Fire and doesn’t block 2-drops well for its cost. Its primary themes are saboteur creatures, tempo, rolling dice, and fliers.
No color (or color combination) in the set is even close to unplayable, though. You shouldn’t avoid blue if you get passed a late Djinni Windseer or bombs like Grazilaxx, Illithid Scholar or Mind Flayer.
Common Removal
White
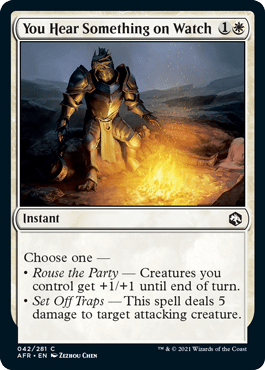
You Hear Something on Watch is a very efficient Divine Arrow variant, though it can be played around if your opponent is paying attention to your mana. The Rouse the Party mode is also not bad as it lets the card do something relevant when you’re ahead.
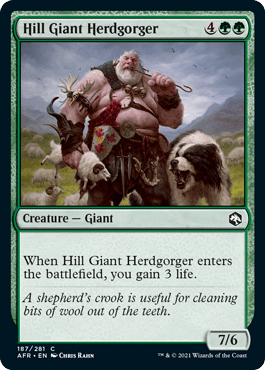
Minimus Containment’s drawback isn’t insurmountable but is notable, particularly if you’re forced to cast it earlier in the game. This card is best in controlling white decks looking to drag out games since the drawback matters less and less the longer the game goes on. The fact that this answers everything from Paladin Class to Hill Giant Herdgorger is a big strength.
Blue
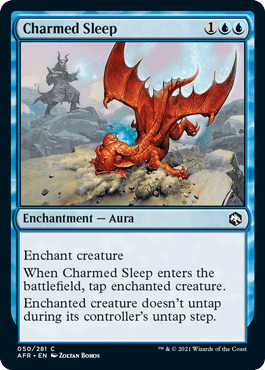
Charmed Sleep is blue’s only hard removal spell, though I shouldn’t say “hard” as there is main deck-able enchantment removal, bounce spells, and a few ways to sacrifice sleeping creatures for value. Still, this is a good rate when it hits a dragon or some other large creature.
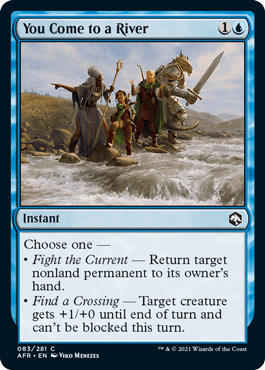
You Come to a River isn’t really removal so much as a temporary solution to whatever problem you’re having. It does play well against equipment and combat tricks, though.
Black
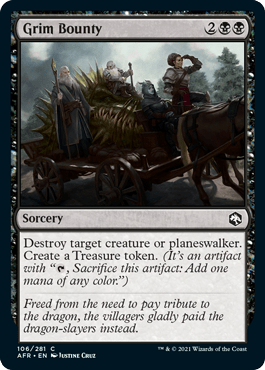
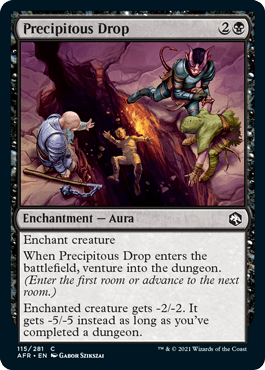
Grim Bounty is black’s best common. Precipitous Drop ranges from awesome to mediocre depending on how many venture cards you have to pair it with. I often cut this from decks without any other venture cards, though I’d be happy to play it with only a couple if I had to.
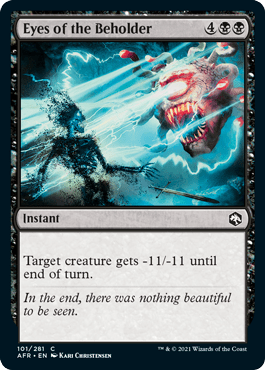
Eyes of the Beholder as a 6-drop is pretty rough and it takes a lot of the fun out of what would otherwise be a Murder. Not even The Tarrasque has enough toughness to withstand this. This is playable, particularly in Sealed or out of the board against slow decks with fatties to kill, though it’s sluggish enough to not be desirable either.
Red
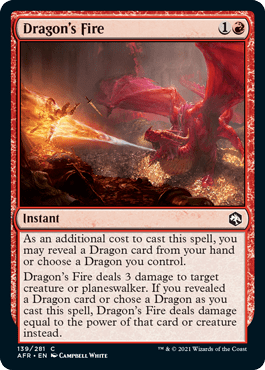
Dragon's Fire is the strongest common in the set. There are a lot of playable 4-mana x/3s that die to this, and just about every 1/2/3 also dies to it. This isn’t even mentioning that it can kill x/4+ with a dragon too.
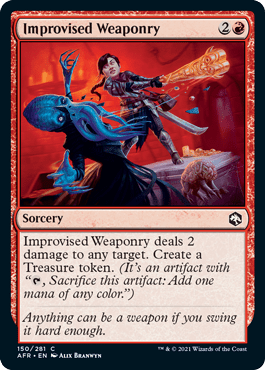
Trading with an early creature while moving towards a big spell is an awesome play pattern for controlling decks, even if Improvised Weaponry looks a bit underpowered. I like a copy or two in my less aggressive red decks and am generally happy to board it in for the aggro mirror. It’s weakest against control decks since they have fewer relevant x/2s, so this might end up rotting in your hand.
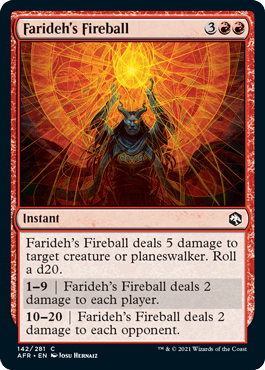
Farideh's Fireball is powerful but clunky. Five mana is a lot for a removal spell. Five damage is good enough to kill just about anything not named Hill Giant Herdgorger or Earth-Cult Elemental, though. Izzet wants this more than other red decks since you’re rolling dice.
Green
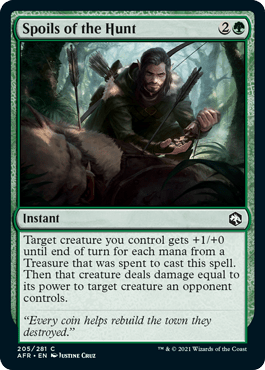
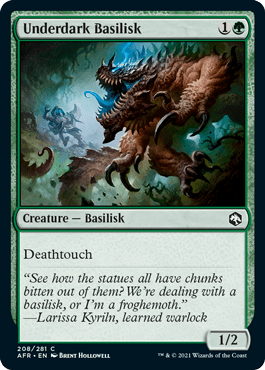
Spoils of the Hunt is a “bite not fight” card. It’s a Rabid Bite, not a Prey Upon. Compared to the Bite (generally a strong Limited common), this is probably a bit worse since three mana is clunky, and it may as well have been a sorcery anyways if you main phase it to play around a removal spell in response. It’s still solid, though, particularly with deathtouch creatures like Underdark Basilisk.
Colorless

Spiked Pit Trap is neither good nor completely unplayable. It offers an okay rate for killing things with a very unexciting upside in the form of a 50/50 for a Treasure token. The Trap is best in Izzet alongside die roll payoffs, but it’s still a card you hope to cut from your 40.
Mana Fixing
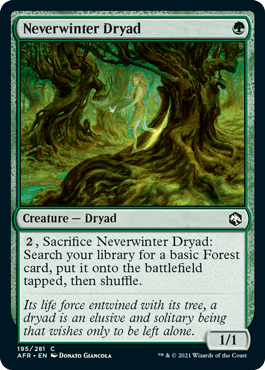
Treasure is the primary form of mana fixing in Forgotten Realms. This is an unusual feature and a major departure from most Limited sets since this means that red and black, the primary Treasure colors, have the best ability to splash powerful cards. In addition to this, green doesn’t get to fix its mana with the kind of cards that it usually would. Both Neverwinter Dryad and Find the Path are restricted to just getting green mana.
If you want to splash without using Treasure, your best options are Evolving Wilds and Temple of the Dragon Queen. There’s minimal fixing otherwise, so expect to build dual colored decks 95% of the time.
Sideboard Cards
Devour Intellect | Illustration by Steven Russel Black
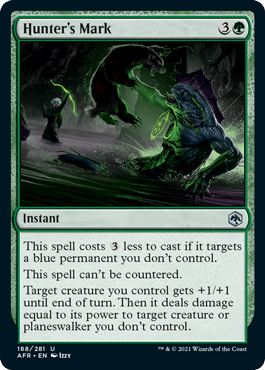
There’s an uncommon cycle of color hosers in this set: Divine Smite, Ray of Frost, Ray of Enfeeblement, Burning Hands, and Hunter's Mark. With the exception of Divine Smite, which is temporary unless it targets a black creature, each is a playable Limited card when hitting normies and extremely efficient when hitting colors it hates. Hunter’s Mark is the best one. I’m just happy to play it in general, though the others are cuttable against opponents who aren’t playing the right color.
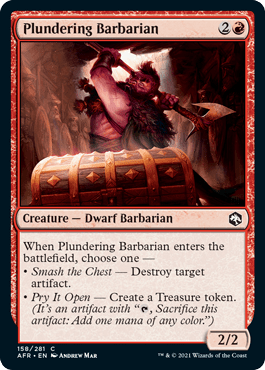
Plummet and You Find a Cursed Idol appear at common in addition to these hate cards, plus cards like Dawnbringer Cleric and Plundering Barbarian. This means that you have a lot of room to maneuver around certain card types if you aren’t playing BO1. Plummet is good against most blue decks or decks with dragons, Baleful Beholder can save you from Paladin Class, and Plundering Barbarian is a very efficient creature against the average Boros deck.
Another aspect of this set that plays well to the importance of sideboarding is that there are two common counterspells (You Find the Villains' Lair and Bar the Gate) plus slow engine cards like Bag of Holding and common hand disruption in Devour Intellect. These cards tend to underperform against aggressive opponents but are strong against opponents looking to do nothing but block, remove your creatures, and cast card draw/fatties.
Draft Archetypes
As with most modern-day Limited sets, Forgotten Realms has 10 draft archetypes, one for each color combo. There are 10 signpost uncommons that show you what each color pair is trying to accomplish at a glance. Every archetype is playable, though there’s a clear best archetype. Let’s start with the best one.
Tier 1 Archetype
Rakdos Treasure: Midrange
Treasure Chest | Illustration by Dan Scott
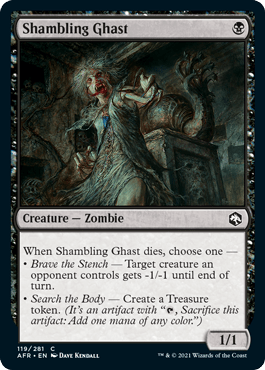
As I mentioned, this set has a funky color balance. Rakdos is actually the best color pair for splashing bomb rares. This is already a nice advantage for the archetype, but that’s just the beginning of its strengths. Rakdos also has a very good archetype uncommon, the best common removal spells, efficient card draw with Deadly Dispute, excellent anti-aggro tools like Shambling Ghast, and the dreaded Price of Loyalty plus sacrifice outlet combo to punish players for going tall with fatties/equipment.
Rakdos is simply the best archetype in the format, period. There’s no deck that’s at the same level. Even train wreck Rakdos drafts where multiple players are in the color combo tend to play out fine thanks to splash options and the fact that it has the best removal and lots of decent filler to pick from. Rakdos also has few real weaknesses since you have access to all the best cards in the format thanks to Treasure, decent aggro creatures, playable fatties, etc.
Rakdos Treasure’s main weakness is actually its reputation. Expect Rakdos to be heavily drafted in pods of competent players since the cat is very much out of the bag. The deck is still playable without getting every Deadly Dispute / Price of Loyalty opened at the table, but it isn’t quite as powerful if you’re fighting for specific commons with other drafters. Certain classes of cards like Ranger Class and Paladin Class (pun intended) also don’t play well with the Treasure splash, so you don’t want to force Rakdos if you’re getting passed cards of that caliber.
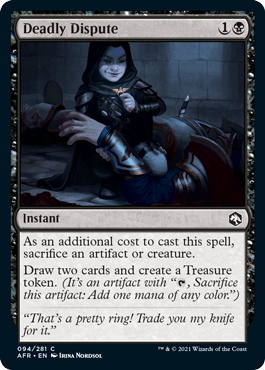
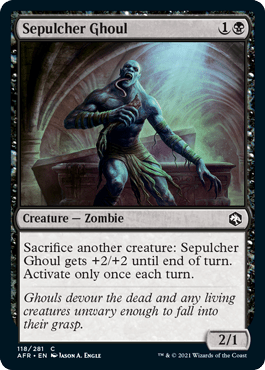
Deadly Dispute is incredibly good in most Rakdos decks as a key piece of card advantage, mana fixing, and a sac outlet for a very affordable cost. Price of Loyalty and Sepulcher Ghoul are also important commons together, though I’d prioritize Price over the Ghoul since it's a very unique card.
Hoarding Ogre, Shambling Ghast, and Plundering Barbarian are solid curve filler for accumulating Treasure while getting on the board early. Shambling Ghast in particular shines when paired with Deadly Dispute.
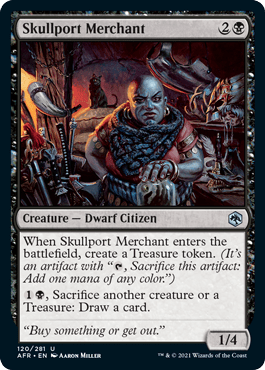
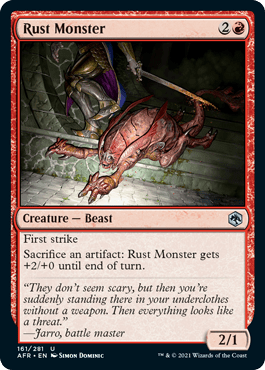
Skullport Merchant is a top 5 uncommon in the set and is yet another awesome sac outlet for Price of Loyalty and an awesome way to use excess Treasures. Rust Monster excels in Rakdos, particularly alongside Unexpected Windfall.
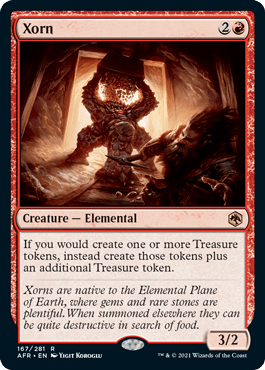
It’s also unique in that it isn’t very good in many other archetypes, unlike the Merchant. Xorn gets a shoutout as a fun payoff for Rakdos Treasure at rare, though it’s not worth picking over Deadly Dispute if you’re trying to win games.
- Managing your Treasure is very important to success with this archetype. Deadly Dispute and Skullport Merchant can convert Treasure into raw cards later. Think carefully about using Treasure to push a tempo lead versus holding back for a later play.
- Deadly Dispute is another important card to manage, as cashing it out too early can leave you with a Price of Loyalty but no sac outlet. Always cash it out early if you’re stuck on lands, but you might want to hold it otherwise to set up the classic combo.
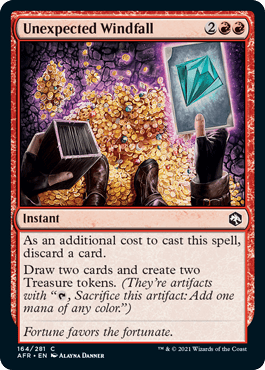
- This is more of a deckbuilding tip than a gameplay tip, but you shouldn’t be splashing double blue cards in a deck with only a couple of Treasures. The most adventurous splashes require Unexpected Windfall, while more mild splashes like Adult Gold Dragon can be consistently accomplished without Windfall.
- Another deckbuilding tip is to understand what pace your Rakdos deck is shooting for. The deck can either be built to be mostly controlling (stalling the board and winning with card draw plus splashed bombs) or mostly aggressive (curving out with Hobgoblin Captain to Hulking Bugbear with removal to kill blockers). Cards like Shambling Ghast play better in the more synergistic control decks, which you’re more likely to have if your pod doesn’t feature multiple Rakdos drafters.
No, I didn’t mis-click in deckbuilding. I actually managed to cast a 3UU card with no Islands multiple times! The rest of the deck was pretty solid too, with lots of equipment to complement the four Hoard Robbers I played for curve.
A more standard Rakdos deck with a much less adventurous splash this time. Three Deadly Disputes and three Shambling Ghasts made for some very smooth draws.
Tier 2 Archetypes
Gruul Pack Tactics: Aggro / Midrange
Targ Nar, Demon-Fang Gnoll | Illustration by Tyler Jacobson
Gruul is a strong archetype whose best cards tend to cost either two or five mana. This is a bit of an odd balance, but it tends to work out just fine in practice. Your game plan in this archetype is pretty straight forward. You want to play some early creatures, avoid trading until you reach pack tactics, and then head to the red zone with mana up and a Bull's Strength or two in hand.
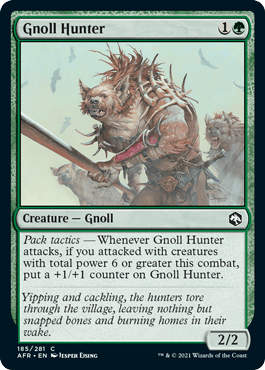
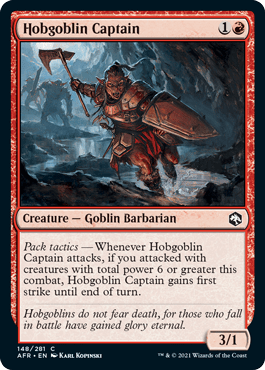

Gnoll Hunter and Hobgoblin Captain are premium Gruul 2-drops, and Owlbear is much better than other 5-drops. Both Swarming Goblins and Elturgard Ranger are playable Gruul decks, though.
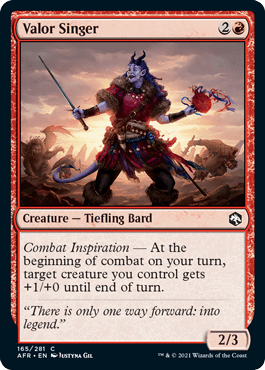
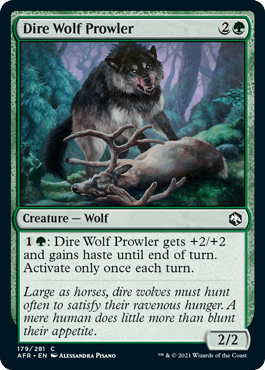
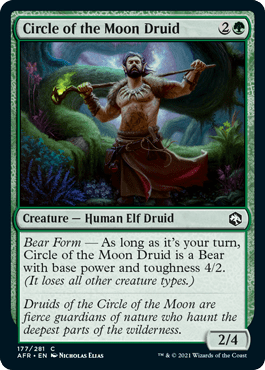
Bull's Strength is the best combat trick in Gruul by a good margin. The sizing, trample, and untap are all relevant, and I’d happily play three copies if I had a good enough mana curve. This archetype’s 3-drops are decent but interchangeable. Valor Singer, Dire Wolf Prowler, and Circle of the Moon Druid are all just fine. Its 4-drops, on the other hand, aren’t very good.
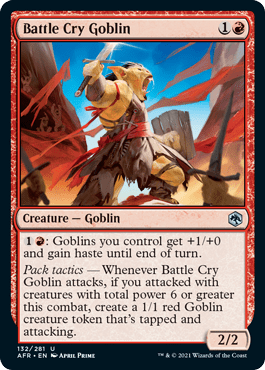
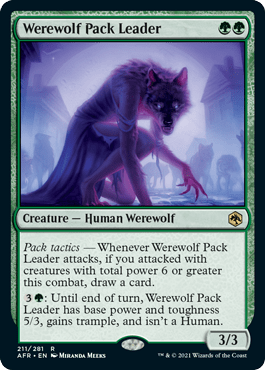
Battle Cry Goblin is the best card in the set with “pack tactics” on it. Outside of Werewolf Pack Leader, that is. Gruul doesn’t really need rares to succeed, so focus on building a good curve above anything else.
- Not trading creatures early is important to hit critical mass, which can make Gruul a bit awkward to play when you’re on the draw against aggro decks. Try to board in extra removal if you have it plus cards like Underdark Basilisk that you normally wouldn’t want.
- The best Gruul decks have a bit of late game to fall back on when your opponent matches your early curve. Don’t be afraid to play good cards in your deck like Red Dragon and Owlbear since you won’t likely be playing less than 17 lands anyways.
- Bull's Strength is excellent against blue decks thanks to cards like Scion of Stygia, Charmed Sleep, and Ray of Frost. The untap effect can either ambush a blocker or act as a random Lava Axe from an otherwise incapacitated creature.
- With the exception of Wandering Troubadour, try not to focus much on venture in this color pair. Gruul has the least amount of venture in the set.
The first trophy I achieved with Gruul. I probably could’ve played a four over Zalto, Fire Giant Duke as it isn't great and I had too many 5-drops.
This was a more recent trophy. I had a very well-balanced curve with great removal spells. Improvised Weaponry wasn’t terrible but could’ve been another pump spell since I wasn’t sure whether or not it was the best card in its slot.
Selesnya Lifegain: Midrange / Aggro
Inspiring Bard | Illustration by Eelis Kyttanen
Selesnya is a great archetype with a simple but effective theme of gaining life for various payoffs. How much your deck leans into this theme will generally depend on how many payoffs you get for lifegain. This archetype plays just fine without Celestial Unicorn if you can’t get it.
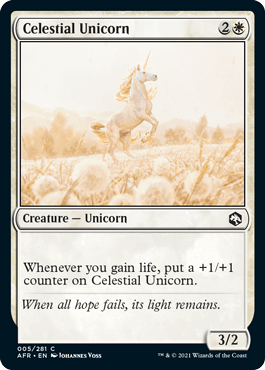
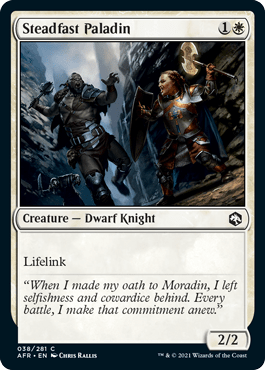

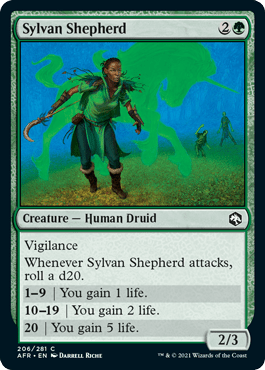
Celestial Unicorn is the only lifegain payoff at common and is a card no one other archetype particularly wants. Steadfast Paladin and Priest of Ancient Lore are the best ways to gain life at common and also just happen to be great cards in general. Sylvan Shepherd overperforms in Selesnya as a decent creature with a very convenient lifegain trigger.
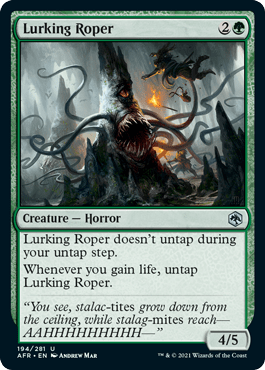
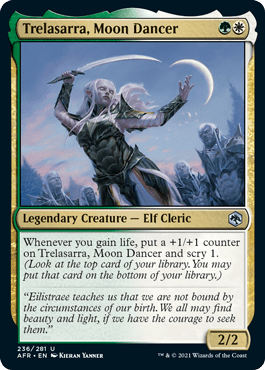
Lurking Roper is basically a 2G 4/5 with vigilance with the right supporting cast, which is an unbelievable rate for Limited. Trelasarra, Moon Dancer and Druid Class are two other uncommons that also excel in this archetype.
- While drafting, prioritize lifegain payoffs over all but the best lifegain cards. There are a substantial number of playables with incidental lifegain (Inspiring Bard, Hill Giant Herdgorger). Try not to pass Celestial Unicorn for cards that aren’t Priest of Ancient Lore quality.
- Selesnya is the aggro build against most blue decks and the control build against most red decks. Good role assessment is key to winning games with this archetype since you’ll want to go under some decks and try to set up fatties against others.
- Be careful of Price of Loyalty coming out of Rakdos decks. This can swing a race or punish you for going too all-in on one Celestial Unicorn. The best way to play around Price is to leave a blocker or two back to compensate for lethal, or Wild Shape for hexproof if you have it.
- Selesnya doesn’t have the same incentives for equipment or combat tricks that Boros and Gruul do. The best Selesnya decks have some removal plus lots of creatures with only a couple of (very efficient) support cards.
A Selesnya deck built around Teleportation Circle with two Moon-Blessed Clerics to consistently tutor it up. Steadfast Paladin plus Plate Armor was a great plan B, too.
This was a strange Selesnya deck built heavily around three Druid Classes as an awesome ramp engine and source of continuous lifegain. Note the 19 lands and three other ramp cards to get to my five(!) Owlbears.
Boros Equipment: Aggro
Adult Gold Dragon | Illustration by Chris Rahn
Boros is a straightforward aggro deck that wants to play cheap creatures, suit them up, and then get your opponent dead. This is the fastest deck in the format and can kill on turn 5 with an uncontested nut draw against a sleepy opponent. Its weaknesses are a lack of card advantage and a weakness to cheap removal and artifact destruction.
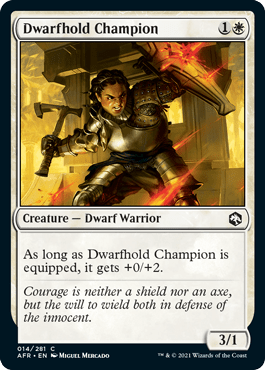
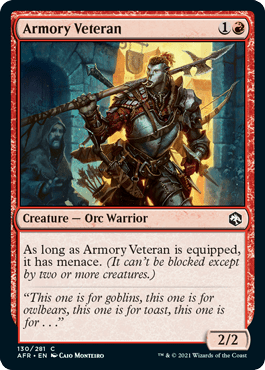
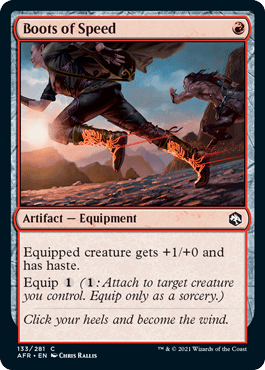
Steadfast Paladin, Dwarfhold Champion, and Armory Veteran wear pants well and are thus excellent in Boros. The best common equipment is Boots of Speed, though a mix of cheap equipment tends to play better than having multiple Boots.
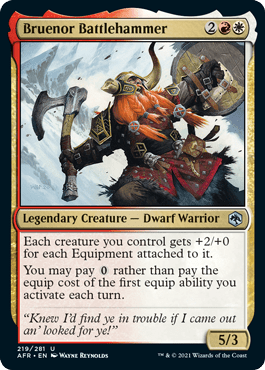
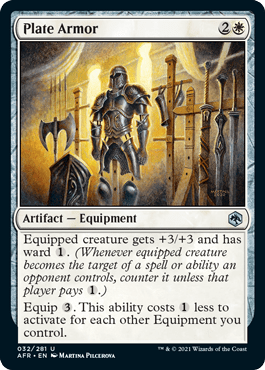

Bruenor Battlehammer is an awesome reason to be Boros and turns any random equipped creatures you have into must-kill threats. Plate Armor is another top-notch payoff for going into this archetype.
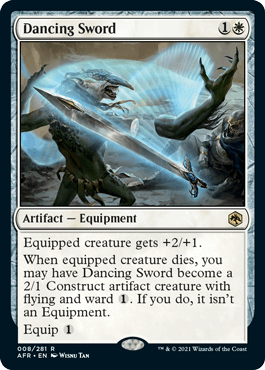
+3/+3 is a substantial bonus and the discount line on equipping is realistic in Boros. Dancing Sword, Adult Gold Dragon, and Paladin Class are among the best rares to open in this archetype, though a good Boros deck won’t depend on rares much.
- Creature density is important for this archetype. Prioritize efficient creatures over equipment in draft since there’s quite a bit of equipment but only so many good 2-drops to go around.
- Paladin's Shield has underperformed for me, and Leather Armor and Greataxe have looked outright awful every time I’ve seen them. Avoid playing with these equipments if you can and seek out other playable options like Boots of Speed, Dueling Rapier, and +2 Mace.
- Don’t prioritize mediocre combat tricks since equipment already provides a way to break through blockers, and creature density is essential.
- Equipment can act as a form of virtual card advantage (more here) against control decks. Even a lowly 1/1 goblin is a real threat with Plate Armor on it. Try not to grind with Boros when you don’t have to, but don’t immediately give up if things aren’t going your way.
I was nearly mono white here, but I had a few red cards all of which played pretty well. Despite being aggressive, there’s no rule saying I can’t play all-around good cards like Priest of Ancient Lore.
An extremely aggressive Boros deck with 16 lands and minimal high end (only one card above 4-mana). This deck played out wonderfully and I even killed someone on turn 5 in my first game.
Tier 3 Archetypes
Orzhov Venture: Midrange
Barrowin of Clan Undurr | Illustration by Manuel Castañón
If you want to dive into some dungeons, Orzhov might just be the best color combo for that in Forgotten Realms. Black is the deepest color in the set for venturing, and white is a close second.
Orzhov isn’t a purely aggressive or controlling combo, it wants to develop its board early while setting up incremental advantages and then come out swinging once it’s completed a dungeon. This will usually be Lost Mine of Phandelver or Tomb of Annihilation, but Dungeon of the Mad Mage isn’t a bad option if you’re trying to grind out some value.
Precipitous Drop is the best Orzhov common in the set. This is the only black color combo that’s overtly interested in venture, so it’s perfectly set up to get -5/-5 drops.
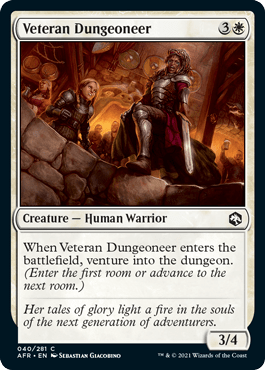
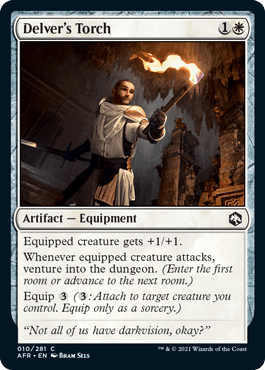
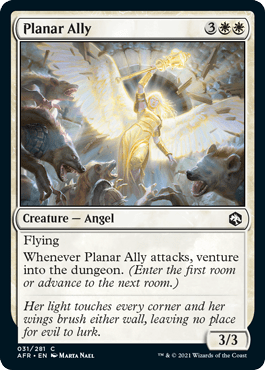
Some cards that have really overperformed in Orzhov outside of removal are Veteran Dungeoneer, Delver's Torch, and Planar Ally. Just about anything with “venture” on it is good as long as you’re mindful of your curve and also take some removal.
Barrowin of Clan Undurr is incredible if you get to attack with it and bring something back once. Outside of Barrowin, there are some solid payoffs like Dungeon Crawler and Cloister Gargoyle. If you want to talk rares, Nadaar, Selfless Paladin is the most busted venture card in the set and an absolute dream come true for the average Orzhov deck.
- All three dungeons are viable for Orzhov since the average deck has a lot of venture and can also play the beatdown. Choose Dungeon of the Mad Mage if you have a repeatable venture setup, Lost Mine of Phandelver if you’re stumbling or unsure, and Tomb of Annihilation to press the attack.
- Some Orzhov decks will happily play equipment while others won’t have much use for all but the best ones. This will generally depend on how many 2-drops you have as well as cards like Ranger's Hawk that wear equipment well.
- Splashing in Orzhov can be difficult, but it’s worth it for the few truly broken cards out there like Xanathar, Guild Kingpin. Don’t forget that you can count on Phandelver/Mad Mage for a Treasure, too.
- Expect to play the control deck against Gruul and Boros. Even Orzhov decks with strong mana curves can’t match the aggression of red combo beatdown strategies. Focus on surviving and protecting your life total until you can make some headway into the dungeons.
A solid Orzhov deck. I didn’t have any rares but this archetype’s fundamentals (mana curve, removal, number of venture cards) were strong.
Orzhov with a blue splash this time, I had fewer venture cards but an overall solid curve that leaned heavily into Skullport Merchant plus Shambling Ghast. Merchant is a strong card even if you aren’t necessarily a “Treasure deck,” so don’t sleep on it.
Golgari Morbid: Midrange
Gelatinous Cube | Illustration by Olivier Bernard
Golgari is a grindy midrange deck looking to facilitate death and reap the benefits. I called it “morbid” because many of its cards have the same text: an unnamed pseudo-morbid that says, “at the beginning of your end step, if a creature died this turn, do something useful.”
This line comes in different forms from Shessra, Death's Whisper to Death-Priest of Myrkul to Bulette. Expect to set up some blockers and ramp early, facilitate some value trades, kill your opponent’s best creatures, and then win with some random fat like Purple Worm or Hill Giant Herdgorger.

Removal is very important for Golgari. It’s an easy way to force things to die on your turn without your opponent having to trade. Grim Bounty, Spoils of the Hunt, Precipitous Drop, and even Eyes of the Beholder are desirable cards to have several copies of.
Outside of removal, Yuan-Ti Fang-Blade is a decent creature and a sneakily good “morbid” enabler, as a deathtouch-er with a relevant saboteur trigger. Underdark Basilisk is another solid common, particularly with Shessra, Death's Whisper.
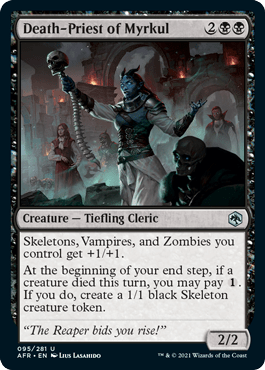
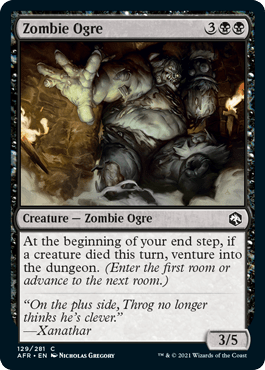
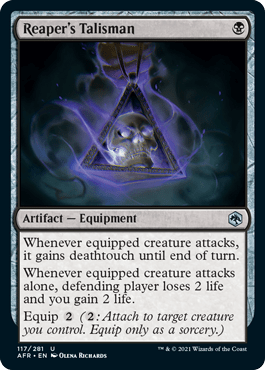
Shessra is an obvious one, with Death-Priest of Myrkul coming in a close second. Zombie Ogre can also be solid if you have other venture cards to support it. Reaper's Talisman deserves a shoutout as one of the best morbid enablers in the format.
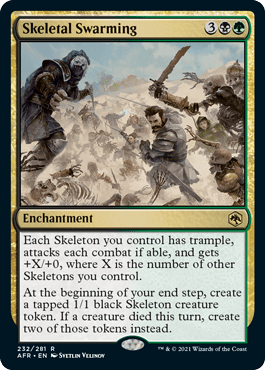
Finally, the granddaddy of Golgari cards is Skeletal Swarming. This is a powerful engine that can basically kill your opponent on its own if you set up morbid a few times.
- Golgari isn’t really aggressive enough to force trades every time you attack, which can create some tension when setting up morbid. This is why spot removal, Shessra, Death's Whisper, and cards like Yuan-Ti Fang-Blade are essential.
- Golgari is actually one of the better venturing color pairs in the format, probably third behind Orzhov and Azorius. Many of the black venture cards play well in Golgari, and this is also a strong home for green venture cards like Find the Path, Wandering Troubadour, and Intrepid Outlander.
- Golgari can play a mock Rakdos game with Shambling Ghast and Deadly Dispute, two solid cards that play well with its morbid theme.
- Don’t get too married to cards like Bulette, which is merely playable filler here despite looking strong for the archetype. Just play the best cards you can and let the synergies naturally fall into place.
No Shessra, Death's Whisper, so the morbid theme here was pretty incidental. This was more of a ramp deck looking to accelerate into Owlbear and three different dragons to go over the top.
This deck leaned more into the morbid theme and had the best Skeletal Swarming I’ve ever seen thanks to having five Clattering Skeletons. Note the three Neverwinter Dryad, which let the deck consistently go turn 1 Dryad, turn 2 activate, turn 3 Skeletal.
Dimir Rogues: Tempo / Control
Guild Thief | Illustration by Mike Jordana
Dimir rogues is a tricky deck looking to abuse saboteur creatures and poke a hole in your opponent's defenses, as you might expect. It can be built as a tempo deck leveraging cards like Thieves' Tools, or more of a control deck with lots of removal, card advantage, and some rare bombs.


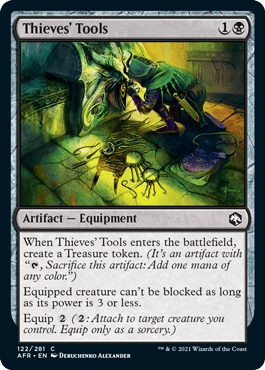

If you’re trying to push the saboteur angle, Soulknife Spy and Hoard Robber are essential and play well with cards like Thieves' Tools and You Come to a River. Shortcut Seeker is also surprisingly good in Dimir. It’s both an excellent blocker and yet another saboteur creature for your unblockable setups.
Removal is important, so prioritize cards like Grim Bounty and Charmed Sleep. Removal does double duty of protecting you from aggro decks and eliminating blockers so your Soulknife Spy can connect.
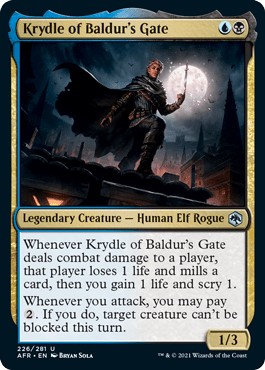
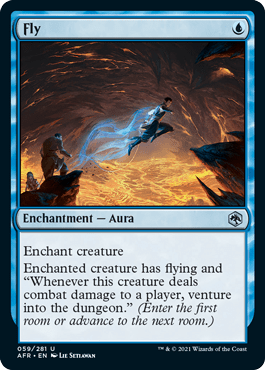

Krydle of Baldur's Gate is one of the best rogues in the set and is both a strong attacker on its own and a repeatable source of unblockable for saboteur triggers. Fly makes little sense outside of Dimir but plays well with You See a Guard Approach and saboteur creatures. Rogue Class is incredibly powerful in Dimir if you’re lucky enough to open or get passed one, though it can be a bit awkward to set up when you’re getting beat down.
- Dimir has a bit of a weakness to aggro strategies. Its signature creatures don’t block particularly well and it loses most races. One silver lining is that Soulknife Spy is a threatening card that tends to slow down games since even aggro players don’t want to take free hits from it.
- This archetype shines against clunky green combo strategies since your opponent taking turns off to ramp into Owlbear or Hill Giant Herdgorger is easily trumped by an unblockable Soulknife Spy.
- With the two points above in mind, good sideboarding can cover Dimir’s weaknesses or accentuate its strengths. Board in counter magic like Bar the Gate against clunky ramp decks and extra defense like Shambling Ghast against fast red combo decks.
- Not all Dimir decks will play like tempo decks. Some will have a minimal saboteur theme, leaning more into removal and card advantage or even venture. Black has the most venture, blue has the third most, and cards like Shortcut Seeker and Fly incidental venture.
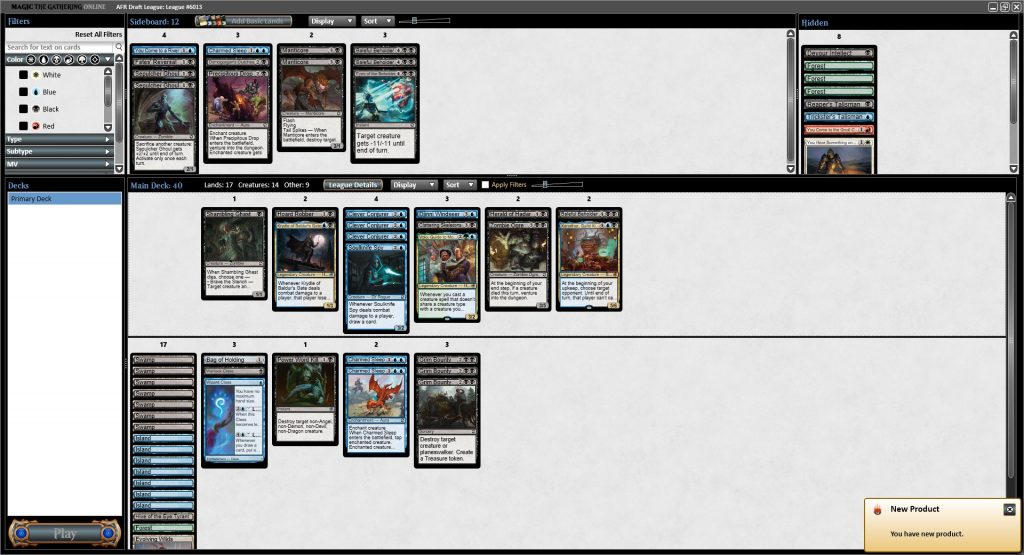
Rogue theme wasn’t too pronounced here, but I had triple Grim Bounty and some awesome bombs and sources of card advantage. Three Clever Conjurers was also strong here with so much good high end and mana sinks.
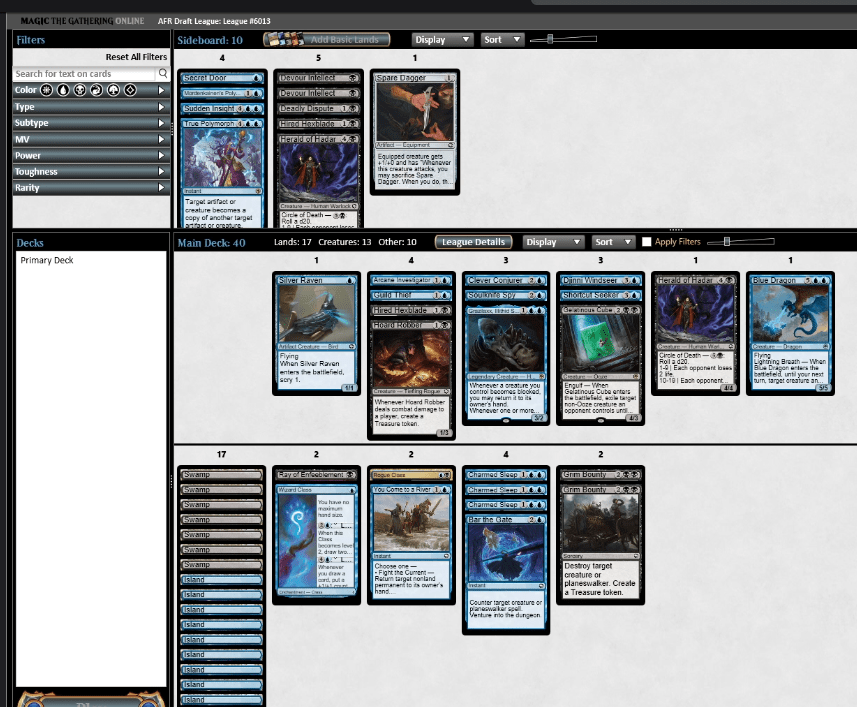
This deck went much deeper on the saboteur theme, going so far as to play Silver Raven thanks to Rogue Class and Grazilaxx, Illithid Scholar. Tempo was the name of the game with this deck, as I leaned on card advantage and classes for late game rather than playing lots of expensive cards.
Tier 4 Archetypes
Simic Ramp: Control / Midrange
Demilich | Illustration by Daniel Zrom
Simic is a very durdly strategy that wants to play long games and grind out card advantage. It falls somewhere between ramp and control since it has lots of playable mana acceleration and mana sinks but isn’t going to win as soon as it resolves the first big spell.
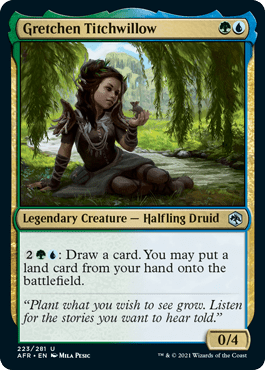
In fact, winning is more of a formality in Simic than anything else. The deck is more than happy to just activate Gretchen Titchwillow over and over while your opponent topdecks useless lands.
Neverwinter Dryad, Find the Path, Clever Conjurer, and even Scaled Herbalist are effective ways to ramp at common. Conjurer plus Find the Path is a nice combo of sorts since Conjurer can untap whatever land you slap Find the Path onto.
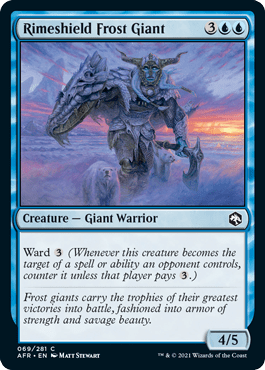
Outside of ramp you want to prioritize strong high end (Owlbear, Rimeshield Frost Giant, Hill Giant Herdgorger), mana sinks, and some removal like Spoils of the Hunt and Charmed Sleep.
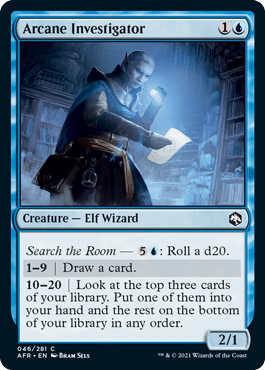

Gretchen Titchwillow is a premium mana sink and early blocker and a fantastic reason to be Simic. You won’t always have Gretchen, so try to draft Arcane Investigator, Secret Door, and other mana sinks as well as classes like Druid Class and Wizard Class.
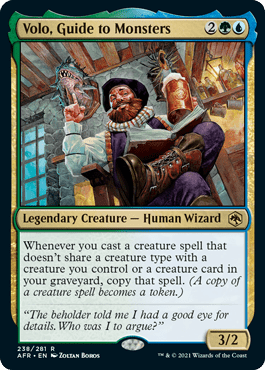
Simic often plays 18+ lands as missing land drops is rough for this deck. You need to play mana sinks to hedge for games where you flood out. Volo, Guide to Monsters deserves a nod as an awesome rare for this archetype, though it isn’t necessary for a good Simic deck.
- The best time to turn the corner in Simic is once the board has been stalled and you have the biggest creature in play. Try not to be in a rush to get games over with since cards like Gretchen Titchwillow are nothing special in quick games.
- You may need to mulligan some 0-landers/do nothing hands, but try not to mulligan excessively. Simic needs a raw quantity of cards to succeed.
- Venture isn’t usually a prominent theme in Simic, but certain cards like Dungeon Map and Displacer Beast play well with its abundance of mana. Find the Path also incidentally ventures which is helpful for getting the ball rolling.
- Simic’s primary weaknesses are its weak removal, lackluster fixing, and vulnerability to Price of Loyalty plus sacrifice effects. It also tends to flood out if its mana sinks and big creatures are dealt with since it plays more mana sources than most decks.
Two Gretchen Titchwillows with a venture subtheme, a splashed Delina, Wild Mage, and lots of mana sinks. I happily played 18 lands and was even bordering on playing 19 but my curve wasn’t quite high enough to merit it.
Izzet Die Rolls: Midrange / Control
Wizard's Spellbook | Illustration by Iris Compiet
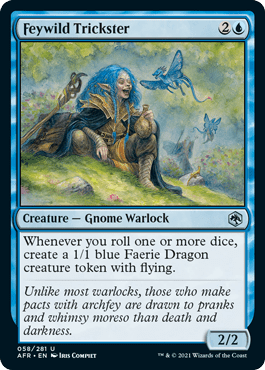
Izzet is a slow but synergistic archetype looking to roll some dice. This archetype wants to stack engines like Farideh, Devil's Chosen, Feywild Trickster, and Barbarian Class with the many playable commons that roll dice.
Expect to be the control deck in most matchups. Izzet has humble early creatures and needs some time to set up. Your main weaknesses are clunky openers and reliance on very killable payoff cards.
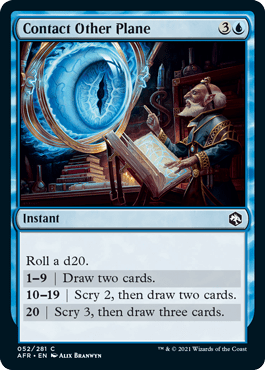
Having a density of “roll a die” cards is essential, so prioritize the best ones like Djinni Windseer, Hoarding Ogre, and Farideh's Fireball. Other options like Arcane Investigator, Swarming Goblins, and Contact Other Plane are also desirable.
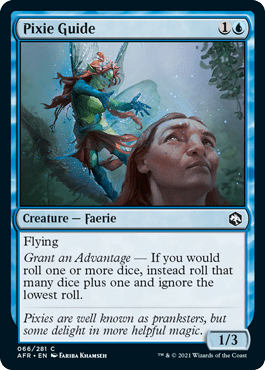
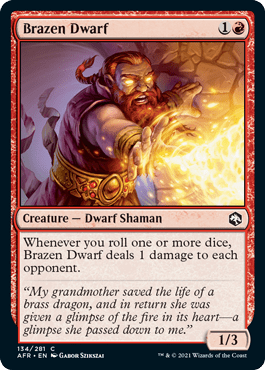
Pixie Guide is the best Izzet common that doesn’t directly roll a die. Brazen Dwarf is playable but generally underwhelming, so don’t prioritize it. The exception to this is if you can get at least three copies because it's much better in multiples.
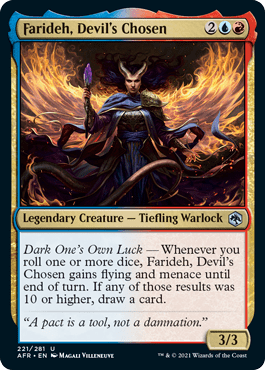
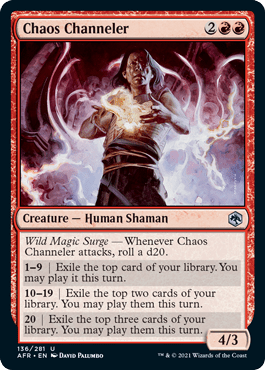
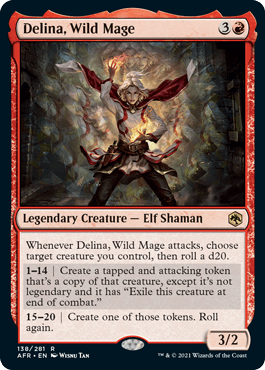
Izzet heavily relies on uncommon payoffs to go over the top of other strategies. Farideh, Devil's Chosen, Feywild Trickster, and Barbarian Class are the best ones. There are also some premium uncommons like Chaos Channeler that are A+ in this archetype, though they’ll be contested by other red combo drafters. Delina, Wild Mage is the best Izzet rare, particularly alongside Pixie Guide for a luck-based “Splinter Twin” combo.
- Knowing when to turn the corner in Izzet is essential and will usually come after you untap with Farideh, Devil's Chosen, Hoarding Ogre, or leveled-up Barbarian Class / Wizard Class.
- Izzet is the best home for durdly engines like The Deck of Many Things and Wizard's Spellbook, particularly if your early removal is good enough.
- You tend to glut on 2s/4s a lot and be light on 3-drops when drafting Izzet. Prioritize Scion of Stygia, Clever Conjurer, and Charmed Sleep a bit higher than normal to compensate for this.
- Stacking “roll an extra die” effects (Pixie Guide and Barbarian Class) means that you can reliably count on 10 to 19 results from most of your cards. Try to set those up first if you can before playing out your hand.
First Farideh, Devil's Chosen trophy of mine. I had a fair number of die roll cards, decent removal and mana curve, and some nice card advantage.
A better Izzet deck with a leaner curve and a broken rare to splash. This was also my first time playing with Delina, Wild Mage and Pixie Guide, which was gross.
Azorius Venture: Control
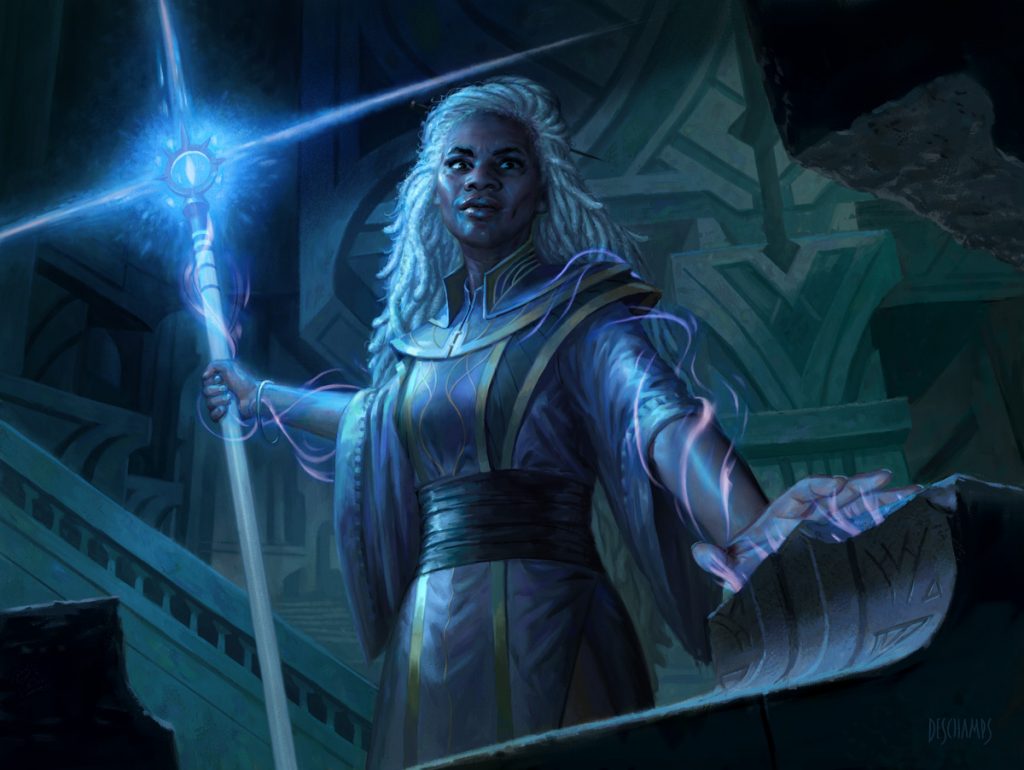
Hama Pashar, Ruin Seeker | Illustration by Eric Deschamps
Azorius is arguably the worst deck in the format and is the sole dual-color archetype with a ~49% win rate on 17lands. This is a very controlling deck that wants to dawdle and head into dungeons with an active Hama Pashar, Ruin Seeker. It’s not particularly good at beating down and struggles to find the right tools to fend off aggression.
With that said, the deck isn’t unplayable. I have trophied with it several times and drawing six cards off Mad Wizard’s Lair is a moment everyone deserves to experience at least once.
Azorius isn’t an aggro deck by any means. Its key priorities are staying alive and venturing, in that order. Because of this, the best Azorius commons are Priest of Ancient Lore, Minimus Containment, and You Hear Something on Watch followed by strong venture cards like Veteran Dungeoneer. Dungeoneer is particularly excellent thanks to its 4 toughness because it blocks the vast majority of aggressive creatures in the format.
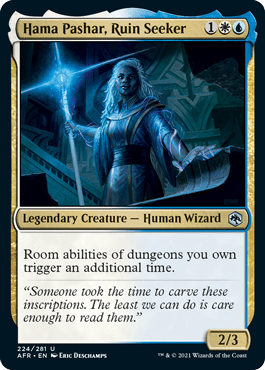

Hama Pashar, Ruin Seeker is powerful but very slow since it has to see multiple dungeon triggers (or late ones) to do anything remarkable. Azorius is the best home in the format for blue venture uncommons like Displacer Beast and Eccentric Apprentice since the archetype is the only 100% venture focused blue deck in Forgotten Realms.
- Azorius has an abundance of playable 3-drops to choose from, so try to lean away from 3-mana cards when you aren’t picking premium ones. Solid playables like Soulknife Spy and Clever Conjurer fight with better cards like Priest of Ancient Lore for the same slot.
- This archetype is the premier Dungeon of the Mad Mage deck in the format, though you may want to go into Lost Mine of Phandelver first. Azorius is so slow that venturing 11 times in one game is a real possibility.
- Hama Pashar, Ruin Seeker plays well with either Phandelver or Mad Mage. Phandelver provides quicker payoffs for Hama’s double trigger while Mad Mage has the best late game benefits.
- Expect to be the control deck in just about every matchup. Expect to win games with card advantage from Mad Mage and flying beaters like Planar Ally and Djinni Windseer after stalling out the board with blockers like Secret Door and Veteran Dungeoneer.
A somewhat proactive Azorius build, I had a solid number of early creatures and two Delver's Torches. The black splash was worth it thanks to two Evolving Wilds and a large density of venture cards.
This was a more durdly build with a higher focus on venturing and no splash. 18 lands was an easy choice with two manlands and several playable mana sinks, though I still would’ve liked a few more good early plays.
Subthemes
Dragons
There are 16 dragons in Forgotten Realms, only one of which is common. Most of the dragons appear at rare and mythic rare, though there is a cycle of uncommon dragons in each color, plus Wandering Troubadour. Dragons are notable in this set thanks to a couple of cards that specifically reward you for playing them, though most aren’t particularly good or easy to pull off.
The few cards that have this gameplay pattern are:
Dragon’s Disciple
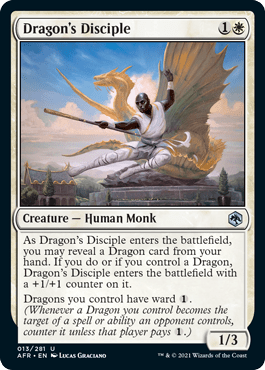
A 2-mana 2/4 with upside is awesome, but the math for having a dragon in hand when you play Dragon's Disciple on turn 2 is 70+% only with four or more dragons. This usually isn’t worth playing because of that, since most decks will have somewhere between one to two dragons, not four+.
Dragon’s Fire
As I already mentioned, Dragon's Fire is the best common in the set, though that has less to do with the dragon upside and more to do with being very efficient removal. Still, it’s a card that rewards you for having dragons which has definitely come up for me with Jaded Sell-Sword letting this kill 4 toughness creatures.
Orb of Dragonkind
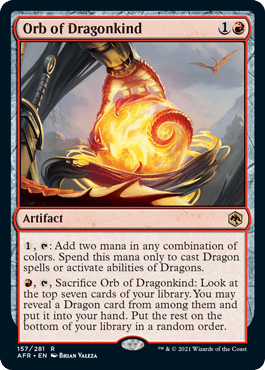
Orb of Dragonkind is almost completely unplayable, though I might play it with Tiamat and a couple of other dragons in my deck. Speaking of…
Tiamat
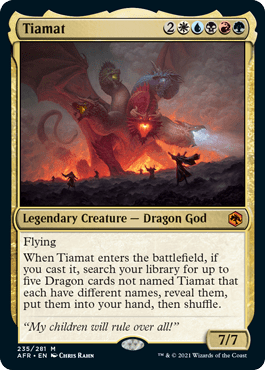
The dragon theme is mostly there for the one out of a hundred or so drafts when you get to attempt the Tiamat deck. This is a very fun build-around with a dramatic payoff, but also a dramatic ask of you. The best way to get this done is probably Unexpected Windfall. And don’t forget that Jaded Sell-Sword is a dragon.
Temple of the Dragon Queen
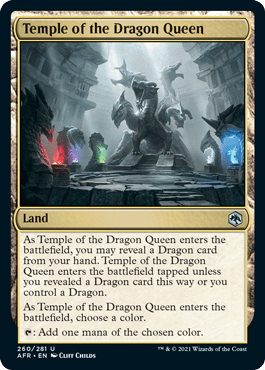
This is great Limited fixing even with no dragons but having a dragon in hand makes Temple of the Dragon Queen an incredibly good land.
Goblins
Goblin Javelineer | Illustration by Mike Jordana
There are seven goblins in AFR, three at common, plus Den of the Bugbear and the 1/1 goblin token from Lost Mine of Phandelver. This is notable because of two great cards that care about goblins: Battle Cry Goblin and Hobgoblin Bandit Lord.
Battle Cry is excellent on its own but even better with other goblins, whereas Bandit Lord is a build-around that goes off with cards like Swarming Goblins. The only goblin outside of red is Grim Wanderer, which means you don’t need to be a certain color combo to pull off goblin tribal. It won’t happen often, though.
Teleportation Circle
Teleportation Circle is a rare, but you can pull this off a bit more consistently than you might expect thanks to Moon-Blessed Cleric. Basically every single color has some very solid ETB cards, particularly white with Priest of Ancient Lore and Potion of Healing.
Potion of Healing isn’t great on its own, but playing a couple of them is a small price to pay with Teleportation Circle in your deck. 3W “draw a card each turn” is an unbelievable card in Limited.
Wrap Up

Long Rest | Illustration by Chris Seaman
There’s probably more I could write about, but I think this has been a rather comprehensive overview. You should have plenty to go off of for this format! Innistrad will be out mid-September, so enjoy Forgotten Realms while you can. There are sadly few high-level events scheduled for AFR, but it’s still a fun format to ladder with.
What’s your favorite part of this format? Let me know if the comments down below, or head over to our Discord if that’s more your thing. And don’t forget to grab Arena Tutor if you’re planning on drafting in MTGA and want free up-to-the-second advice on your picks.
Until next time, may you always reach the bottom of Dungeon of the Mad Mage!
Follow Draftsim for awesome articles and set updates:


7 Comments
Thank you so much for this article! I just got started with Arena a few weeks ago and this kind of comprehensive review for me is absolute gold! Time to play around with some of these archetypes!!
Perfect! I’m so glad you found it useful.
Helloooo! I just wanted to follow up and say that I just did a draft for the first time after reading this article (and playing around with the draft simulator) and got 7 wins with a Rakdos Treasure build!!! 95% credit to draftsim, especially this article for that! I was super happy with the win! Thank you!
This is my third primer I read on Boros equipment and not one has mentioned rust monster. It is an absolute powerhouse of a common – especially if you have a dueling rapier or three. Ingenious Smith should also get a mention, though that’s a bit more obvious.
Definitely a good Uncommon (not common) but it is really more maximized in BR I think. Lots of spare treasure lying around.
Ah wow my mistake, how did I end up with 3 last draft? I also really like Hobgoblin captain, as getting to pack tactics is fairly easy in such a deck, and quite a lot of equipment boosts power. A few times I’ve hit 1 – boots of speed, 2 Hobgoblin captain, 3 armory veteran or another HC, plus equip for a very good turn 3.
PS. I agree that rust monster does well BR but I think in BW it is a card that works better than it reads. It’s easy to boost its power and it offers a huge amount of flexibility especially coupled with how aggro you are. E.g. you take 10 life off them before they regain control of the board state, but with a rust monster and some equipment out they need to be really careful not to lose the game, you can attack and they can block and lose creatures or let through and risk losing the game outright, especially if you can threaten with a dueling rapier in your hand
Add Comment